App icons are super important for your app's success! A great icon can even double the number of people who download your app. The best way to find out which icon works best is to test them. Here’s how you can A/B test your app icons on the Apple App Store.
Step-by-Step Guide to A/B Test App Icons
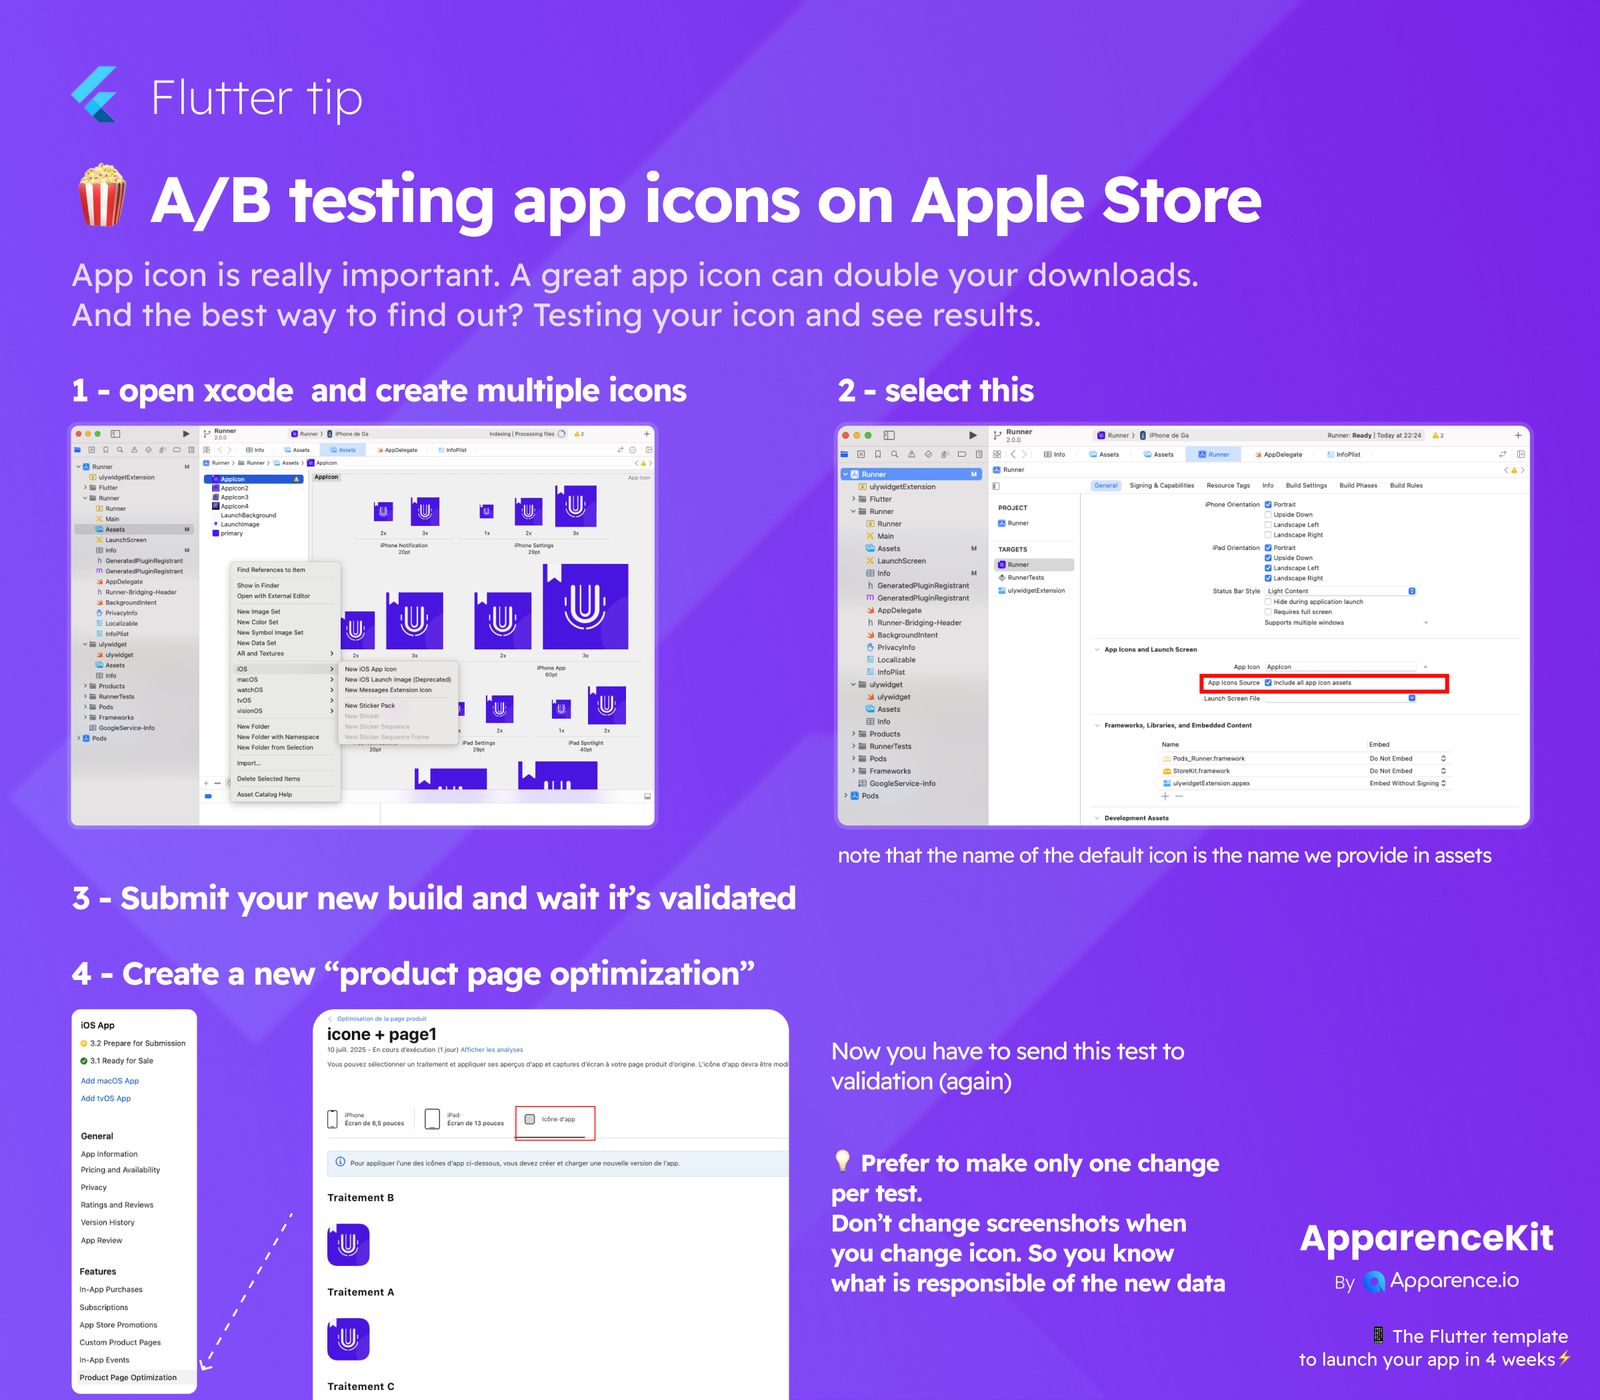
1. Prepare Your Icons in Xcode
First, open Xcode. You'll need to create multiple versions of your app icon.
- Navigate to your project's
Assetsfolder. - Here, you can add new "iOS App Icon" sets for each icon you want to test. Make sure you have all the required sizes for each icon version.
2. Configure Your App Icon Source
Next, you need to tell Xcode which icon set to use.
- In your Xcode project settings, go to the "General" tab.
- Find the "App Icons and Launch Screen" section.
- Under "App Icons Source," select the specific icon set you want to test from your assets.
Quick Tip for Icon Names
Note that the name of the default icon you select here is the one you provided in your assets folder.
3. Submit Your Build
Once you've set up the icon you want to test first, submit your new app build to Apple.
- You'll need to wait for Apple to review and validate this build. This is a standard part of the app submission process.
4. Create a New Product Page Optimization Test
After your build is validated, it's time to set up the actual A/B test in App Store Connect.
- Go to App Store Connect for your app.
- Find the section for "Product Page Optimization."
- Here, you can create a new test. You will select different app icon versions to show to different groups of users.
Re-submit for Validation
Now you have to send this test to validation (again).
Important Advice for Testing
Focus on One Change Per Test
It's really important to only change one thing per test. For instance, if you're testing icons, don't change your app screenshots at the same time. This way, you'll know exactly what caused any changes in your app's performance. This helps you get clear and reliable results from your A/B tests.