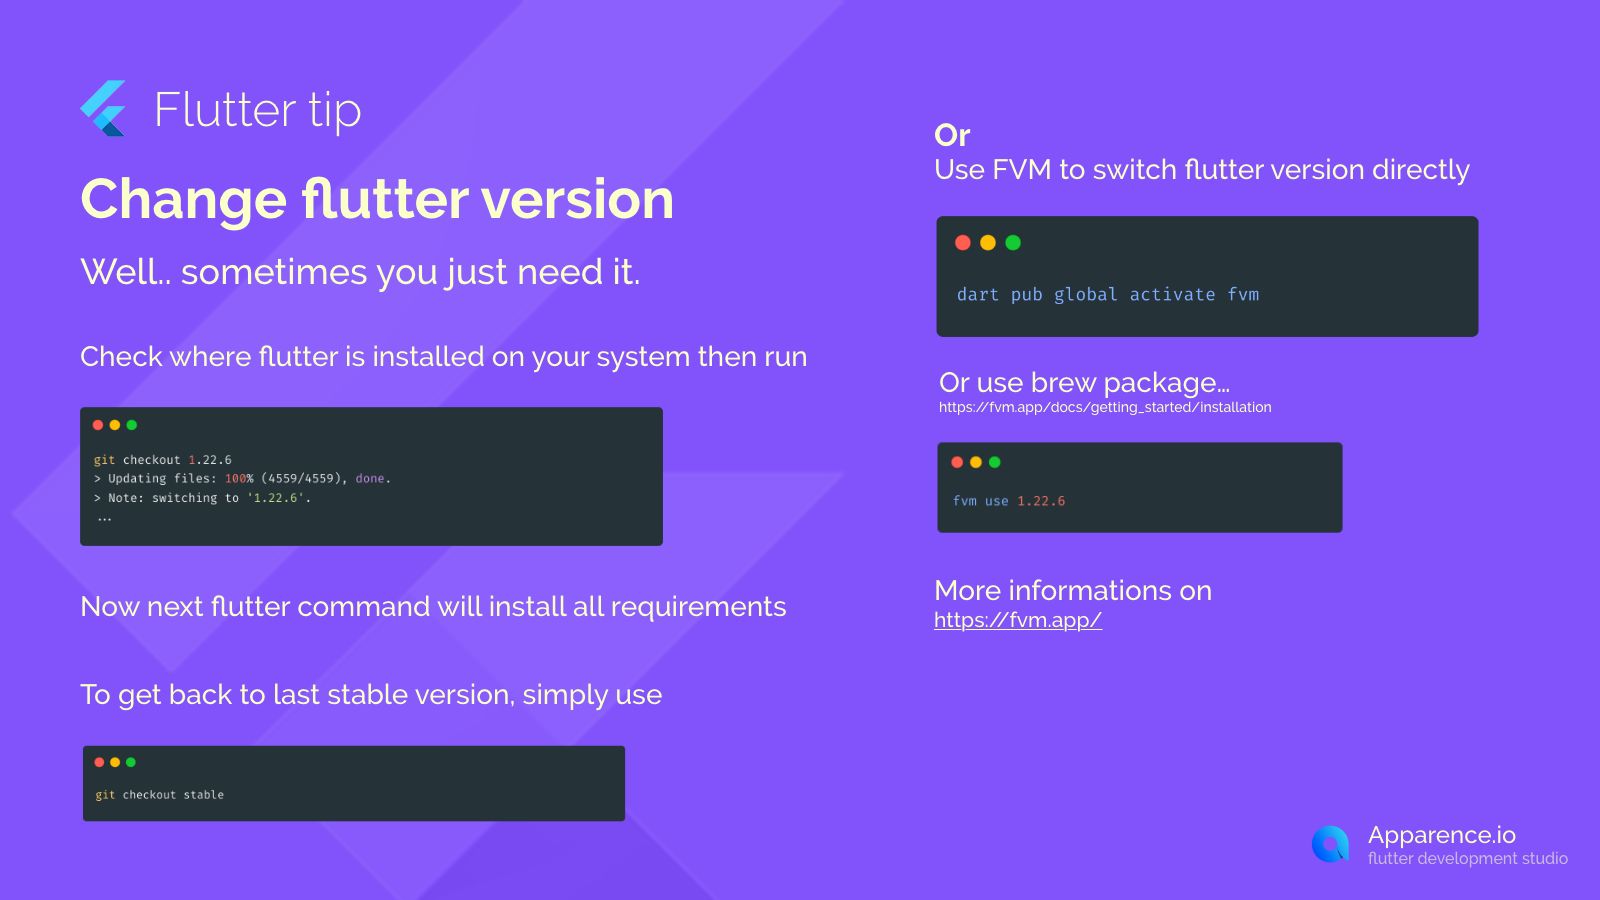
Sometimes you need to change which version of Flutter you are using. Maybe for a specific project or to test a new feature. Here’s how you can do it.
Using Git Checkout
This method uses the built-in version control features where your Flutter SDK is installed.
Finding Your Flutter Install
First, go to the directory where Flutter is installed on your system.
Switching to a Specific Version
Once in the Flutter directory, you can use the git checkout command followed by the version number you want. For example, to switch to version 1.22.6:
git checkout 1.22.6After running this, Flutter will update files and switch to that version.
What Happens Next?
The next time you run a Flutter command, it will automatically download and set up anything needed for that version.
Going Back to Stable
If you want to return to the latest stable version, simply use:
git checkout stableUsing FVM (Flutter Version Management)
A more flexible way is to use a tool called FVM. It lets you manage multiple Flutter versions easily.
Installing FVM
You can install FVM globally using Dart:
dart pub global activate fvmAlternatively, you can install it using package managers like Homebrew on macOS. You can find details on the FVM website.
Switching Versions with FVM
Once FVM is set up, switching is simple. To use version 1.22.6, run:
fvm use 1.22.6FVM helps you manage different versions per project.
More About FVM
For more information and features of FVM, check out fvm.app.
Switching Flutter versions is a common task, and both git checkout and FVM provide easy ways to do it.