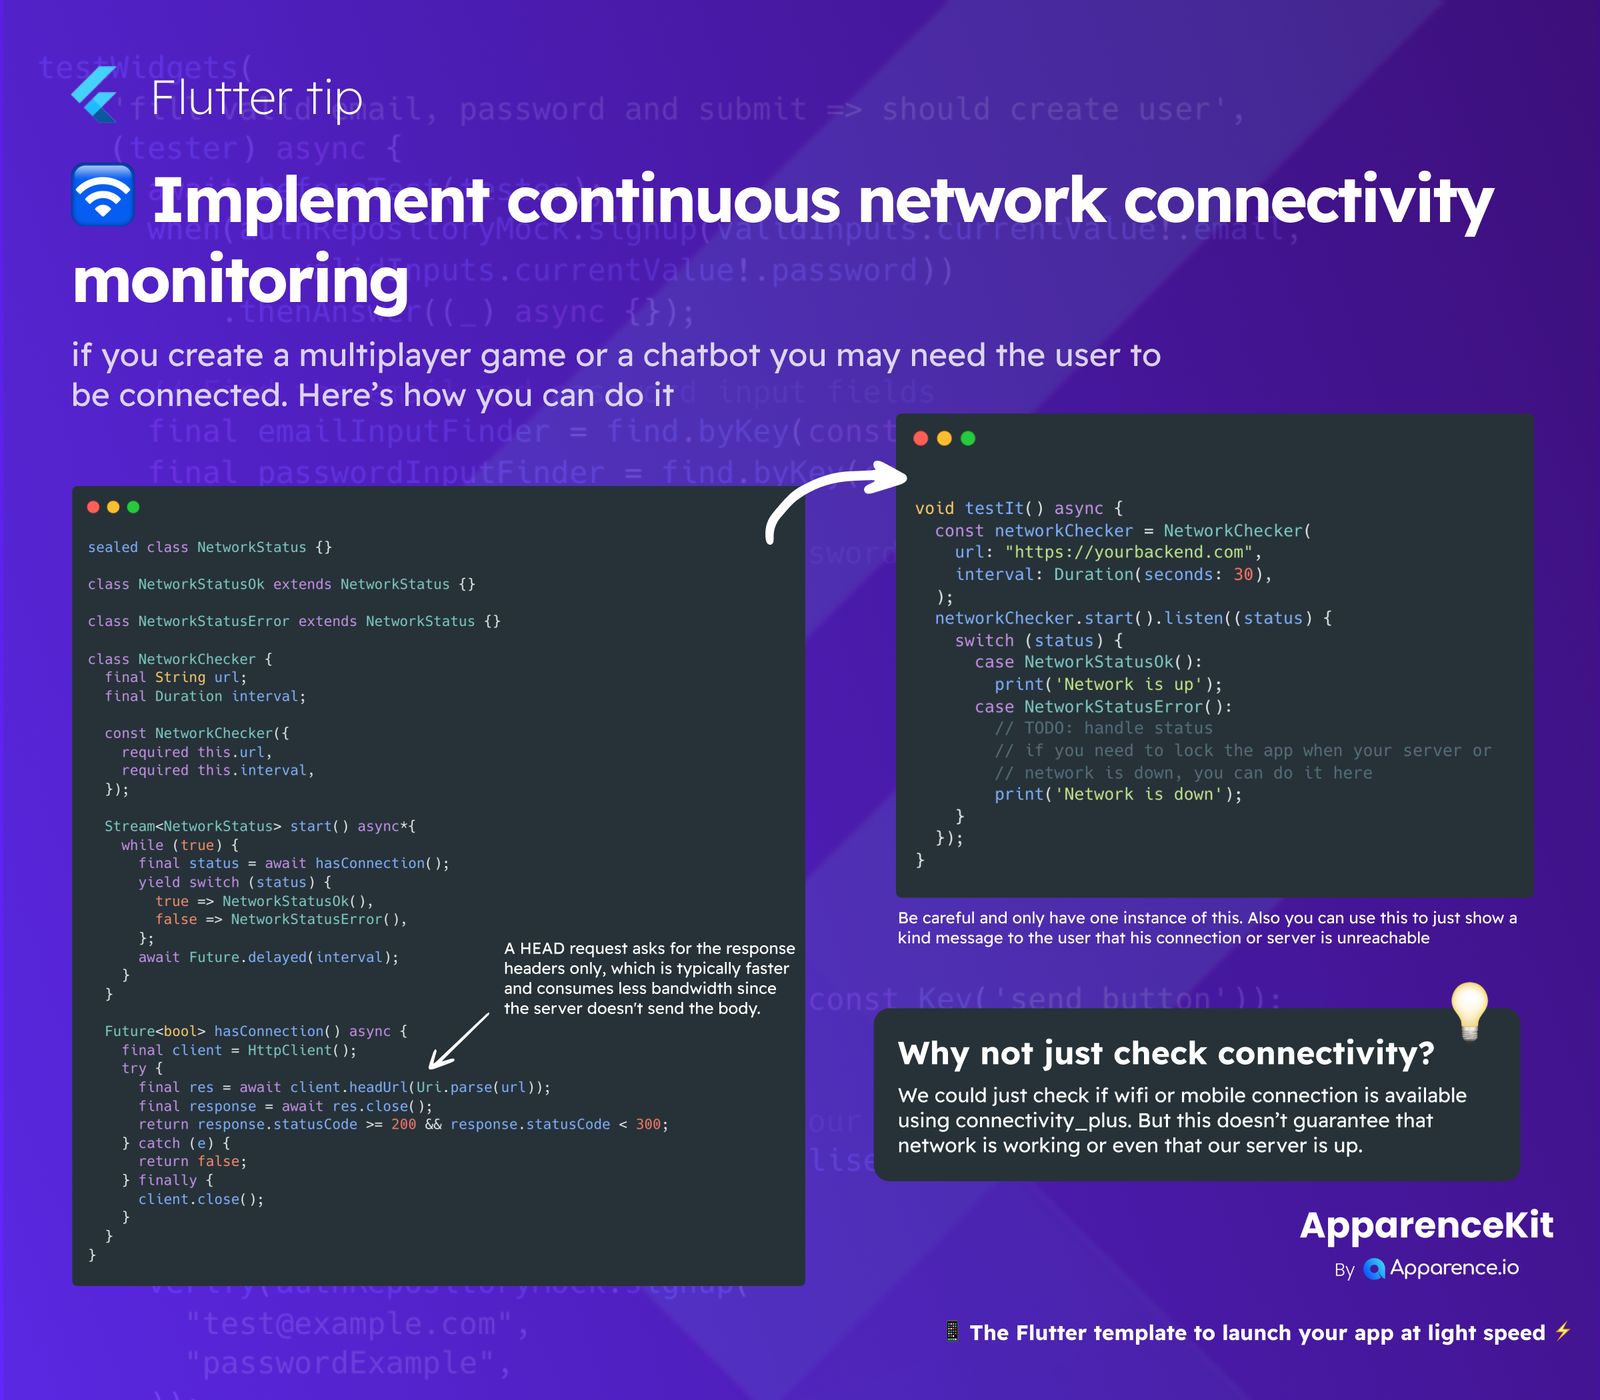
When building apps like multiplayer games or chatbots, ensuring a stable connection for your users is super important. You need to know if they can reach your backend server, not just if they have Wi-Fi. This guide shows you how to implement continuous network monitoring in Flutter.
Why Check Beyond Basic Connectivity?
You might think just checking if Wi-Fi or mobile data is on using a package like connectivity_plus is enough. But that only tells you about the device's internet access, not if your specific server is actually reachable or online. For a truly connected experience, you need to check if your app can talk to your backend.
How to Implement Continuous Monitoring
Here’s a simple way to set up a network checker that continuously pings your server.
Defining Network Status
First, we define two states for our network:
sealed class NetworkStatus {}
class NetworkStatusOk extends NetworkStatus {}
class NetworkStatusError extends NetworkStatus {}
These classes help us clearly know if the network is good or not.
The NetworkChecker Class
We create a NetworkChecker class that takes a url (your backend server address) and an interval for how often to check.
class NetworkChecker {
  final String url;
  final Duration interval;

  const NetworkChecker({
    required this.url,
    required this.interval,
  });

  Stream<NetworkStatus> start() async* {
    while (true) {
      final status = await hasConnection();
      yield switch (status) {
        true => NetworkStatusOk(),
        false => NetworkStatusError(),
      };
      await Future.delayed(interval);
    }
  }

  Future<bool> hasConnection() async {
    final client = HttpClient();
    try {
      final res = await client.headUrl(Uri.parse(url));
      return res.statusCode >= 200 && res.statusCode < 300;
    } catch (e) {
      return false;
    } finally {
      client.close();
    }
  }
}
The start() method continuously checks the connection at the set interval and emits NetworkStatusOk or NetworkStatusError.
The Power of a HEAD Request
The hasConnection() method is where the real check happens. It uses an HttpClient to send a HEAD request to your backend URL. A HEAD request is great because it asks for only the response headers. This is super fast and uses less data since the server doesn't send the full response body. If the status code is good (between 200 and 299), we know our server is reachable.
Using the Network Checker in Your App
In your app, you can set up an instance of NetworkChecker and listen for status changes:
void testIt() async {
  const networkChecker = NetworkChecker(
    url: "https://yourbackend.com",
    interval: Duration(seconds: 30),
  );

  networkChecker.start().listen((status) {
    switch (status) {
      case NetworkStatusOk():
        print('Network is up!');
        break;
      case NetworkStatusError():
        // Handle network down: maybe show a message or lock the app.
        print('Network is down');
        break;
    }
  });
}
Remember to use only one instance of NetworkChecker to avoid unnecessary resource usage. You can then update your UI or show friendly messages to users based on the network status.