Managing different setups (like dev, staging, prod) for Firebase in your Flutter app can be tricky. But there's a cool way to handle it all directly in Dart, letting the firebase plugin use configurations right from your code.
Why use this method?
Easily switch between your different Firebase environments like development, staging, and production. Keep your configurations clean and in one place (your Dart code), making management simpler.
How to set it up
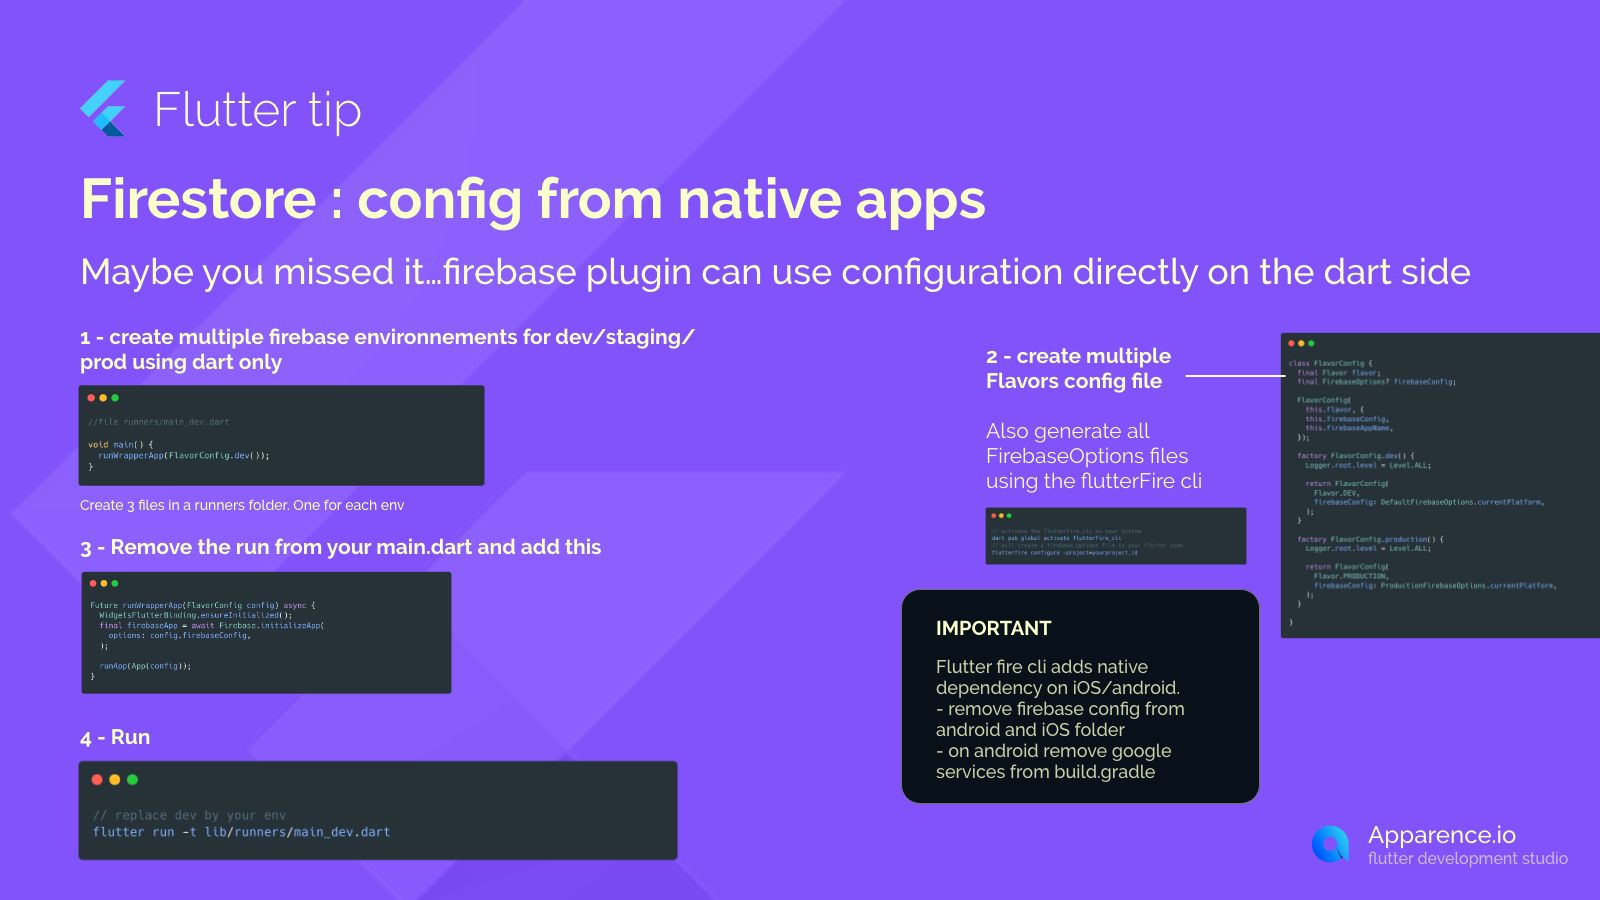
Step 1: Setup for Each Environment
Create a folder, perhaps named runners, at the root of your project.
Inside runners, make separate .dart files for each environment you need (e.g., main_dev.dart, main_staging.dart, main_prod.dart).
Each of these files will have a main function that calls a helper function, passing in the specific configuration for that environment.
Step 2: Create Your Configuration
Make a file for your FlavorConfig class.
This class will hold the Firebase configuration options specific to each environment.
The flutterfire cli can help you generate the FirebaseOptions needed. You'll likely need to install it (dart pub global activate flutterfire_cli) and then run flutterfire configure in your project.
Your FlavorConfig will provide the correct FirebaseOptions based on the environment.
Step 3: Update Your Main File
Remove the standard runApp call from your main lib/main.dart file.
Add a new function, like runWrapperApp, that takes the configuration object as input.
This function will first make sure Flutter widgets are initialized (WidgetsFlutterBinding.ensureInitialized()), then initialize Firebase using Firebase.initializeApp with the options from your configuration, and finally call runApp with your main App widget.
Step 4: Run with Your Environment
When you want to run your app for a specific environment, use the -t flag to point to the main file for that environment within the runners folder.
For example, to run the development version, you'd use a command like: flutter run -t lib/runners/main_dev.dart
Important Note
Using the flutterfire cli to generate options adds native platform configurations.
It's crucial to remove any old, manually added Firebase configuration files from your native project folders (like GoogleService-Info.plist on iOS and google-services.json on Android).
Also, remember to remove the google-services dependency line from your android/app/build.gradle file to avoid conflicts.