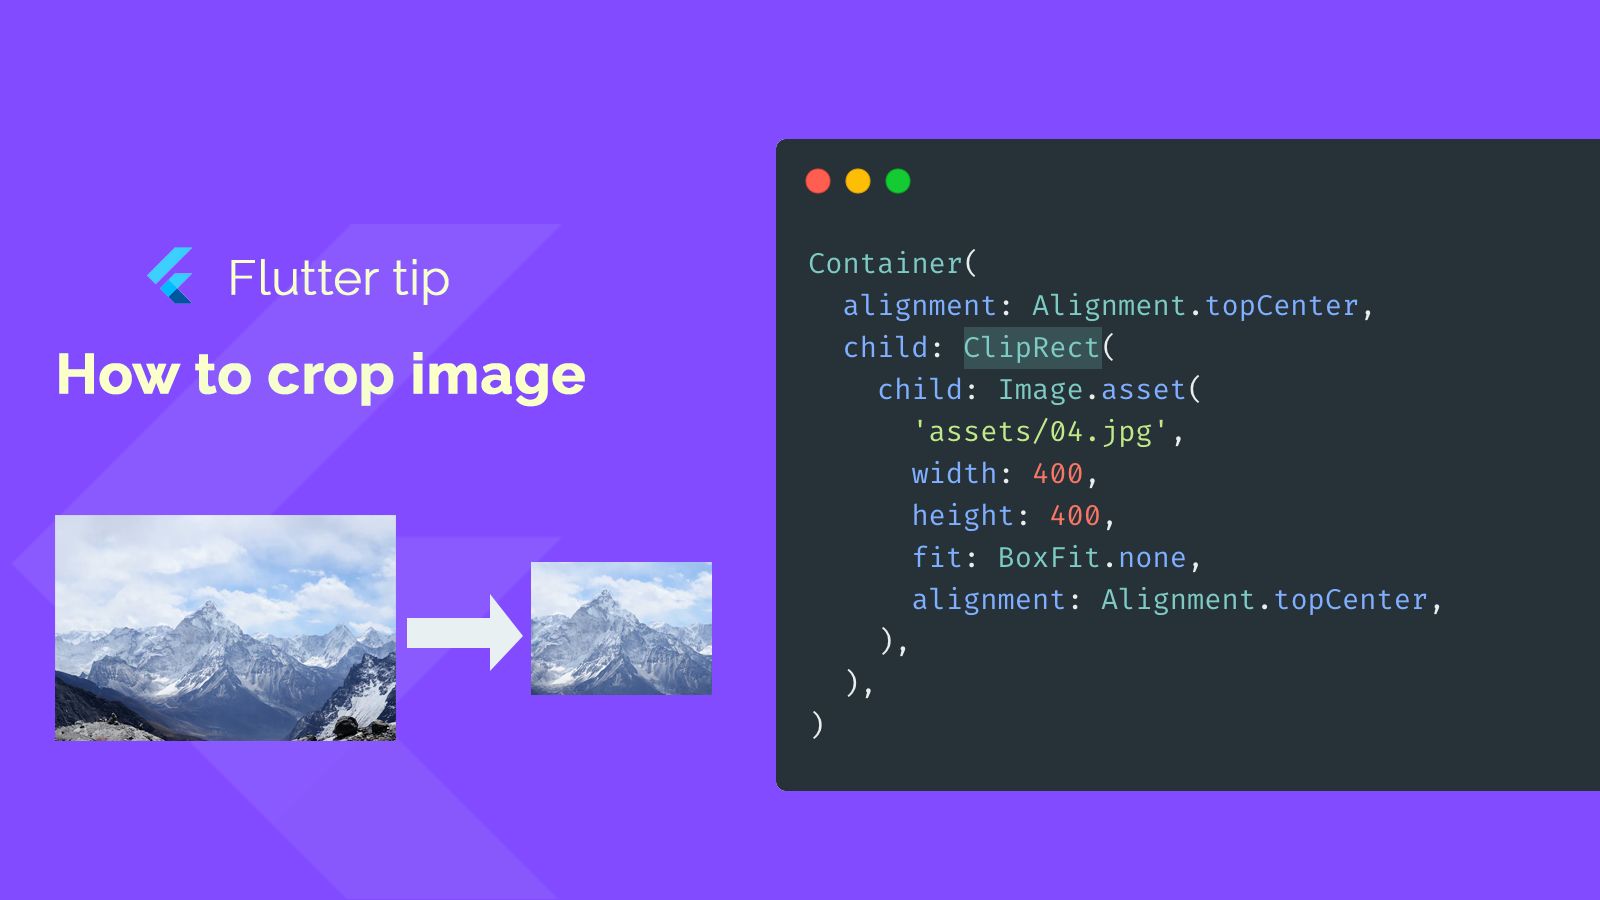
Cropping Images Made Simple in Flutter
Need to show just a part of an image in your Flutter app? Cropping helps you focus on what matters.
The Easy Way with ClipRect
Flutter gives us a neat widget called ClipRect. It's perfect for cutting out a rectangular piece of another widget, like an image.
How ClipRect Works
You place the widget you want to crop, like your Image, inside the ClipRect. The ClipRect itself is often placed inside another widget that defines the size of the area you want to clip to, like a Container.
Setting it Up (Code Snippet Explained)
Container(
  alignment: Alignment.topCenter,
  child: ClipRect(
    child: Image.asset(
      'assets/04.jpg',
      width: 400,
      height: 400,
      fit: BoxFit.none,
      alignment: Alignment.topCenter,
    ),
  ),
)
Looking at the code:
- We use a
Containerto give the cropped area a specific size and alignment. - Inside the
Container, we addClipRect. - The
ClipRect'schildis ourImage.asset. - We load the image file (
assets/04.jpg). - We set the image's own
widthandheight. Note that these can be larger than the parentContainer/ClipRectif you want to crop from a larger image. fit: BoxFit.noneis often used with cropping when you don't want the image to scale to fit the box.- The image's
alignmentinside theClipRectcontrols which part of the image is positioned within the clipping area. Here,Alignment.topCentermeans the top center of the image is aligned with the top center of the clipping area.
By adjusting the size of the Container and the width/height/alignment of the Image, you can control exactly which part of your image is visible.