Managing the state of your Flutter application can sometimes feel tricky, especially when dealing with data that takes time to load, might fail, or is successfully retrieved. This is where Riverpod AsyncState comes in handy, making it much easier to handle these common scenarios.
Why Use Riverpod AsyncState?
Riverpod AsyncState helps you manage your page's state in a super clear way. It lets you define how your app should look and behave when data is loading, when an error occurs, or when your data is ready to be displayed. No more manual toggling of loading indicators or complex error handling logic!
Step 1: Create Your State Notifier
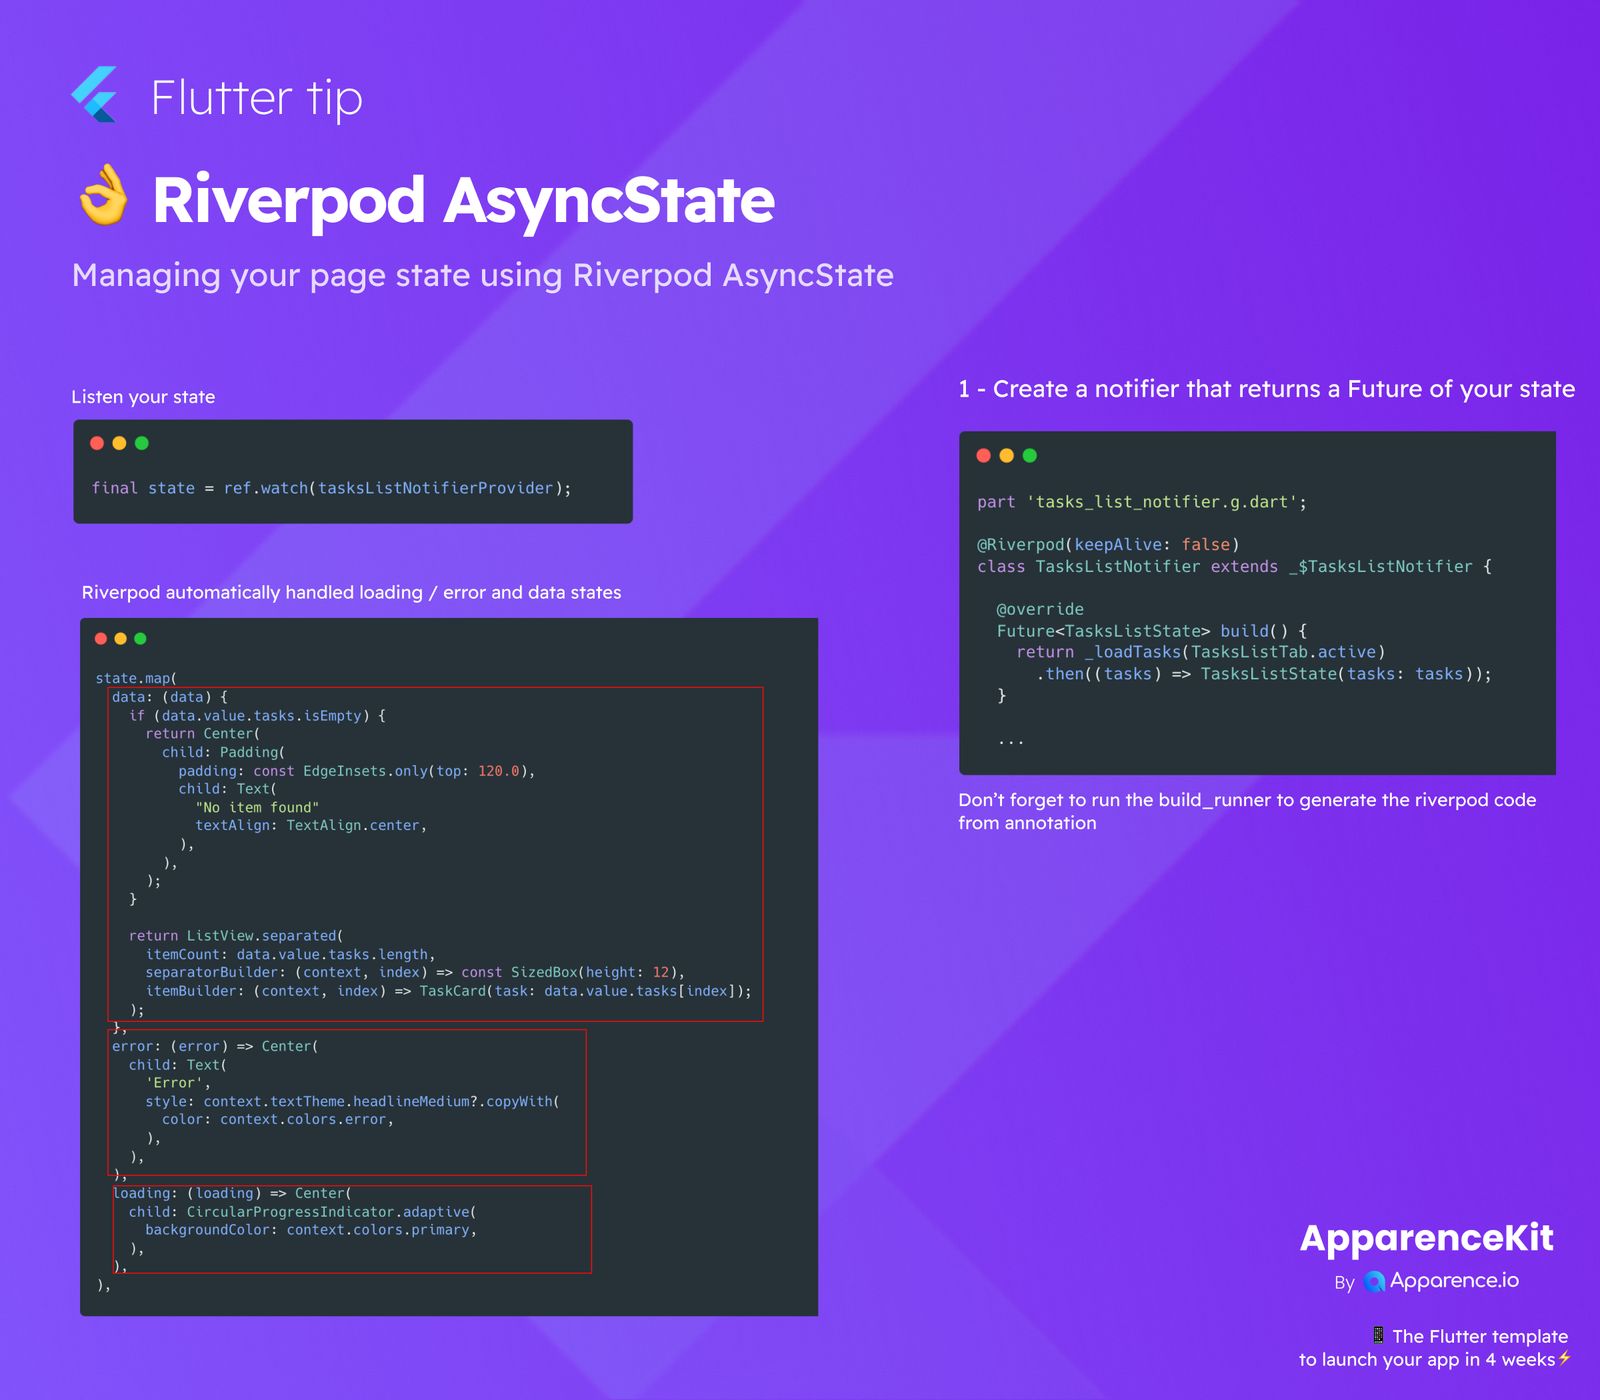
First, you need to create a special notifier that tells Riverpod how to get your data. This notifier should return a Future of your state. This Future is what Riverpod watches to know if your data is loading, done, or has an error.
part 'tasks_list_notifier.g.dart';
(keepAlive: false)
class TasksListNotifier extends _$TasksListNotifier {
Future<TasksListState> build() {
return _loadTasks(TasksListTab.active)
.then((tasks) => TasksListState(tasks: tasks));
}
}Important: After creating your notifier, don't forget to run the build_runner command. This tool generates the necessary Riverpod code from the annotations (like @Riverpod) you've added.
Step 2: Listen to Your State
In your widget, you can easily listen to the state provided by your notifier. This is where the magic happens, as Riverpod automatically handles the different stages for you.
final state = ref.watch(tasksListNotifierProvider);Step 3: Handle All States Automatically
Riverpod's AsyncValue (which is what AsyncState essentially provides) comes with a handy .map() method. This allows you to define different UI based on whether your data is loading, an error occurred, or the data is successfully available. It's a clean way to show different parts of your UI based on the current state.
state.map(
  data: (data) {
    if (data.value.tasks.isEmpty) {
      return Center(
        child: Padding(
          padding: const EdgeInsets.only(top: 120.0),
          child: Text(
            "No item found",
            textAlign: TextAlign.center,
          ),
        ),
      );
    }
    return ListView.separated(
      itemCount: data.value.tasks.length,
      separatorBuilder: (context, index) => const SizedBox(height: 12),
      itemBuilder: (context, index) => TaskCard(task: data.value.tasks[index]),
    );
  },
  error: (error) => Center(
    child: Text(
      'Error',
      style: context.textTheme.headlineMedium?.copyWith(
        color: context.colors.error,
      ),
    ),
  ),
  loading: (loading) => Center(
    child: CircularProgressIndicator.adaptive(
      backgroundColor: context.colors.primary,
    ),
  ),
);
As you can see, with Riverpod AsyncState, you get a clear and structured way to manage asynchronous data flows in your Flutter app, making your code cleaner and easier to maintain. You define what happens for each state, and Riverpod takes care of the rest!