Making sure your app's look and feel stays the same after you make changes can be tricky.
Sometimes, a small update can accidentally change how a widget looks. You want to catch these issues early.
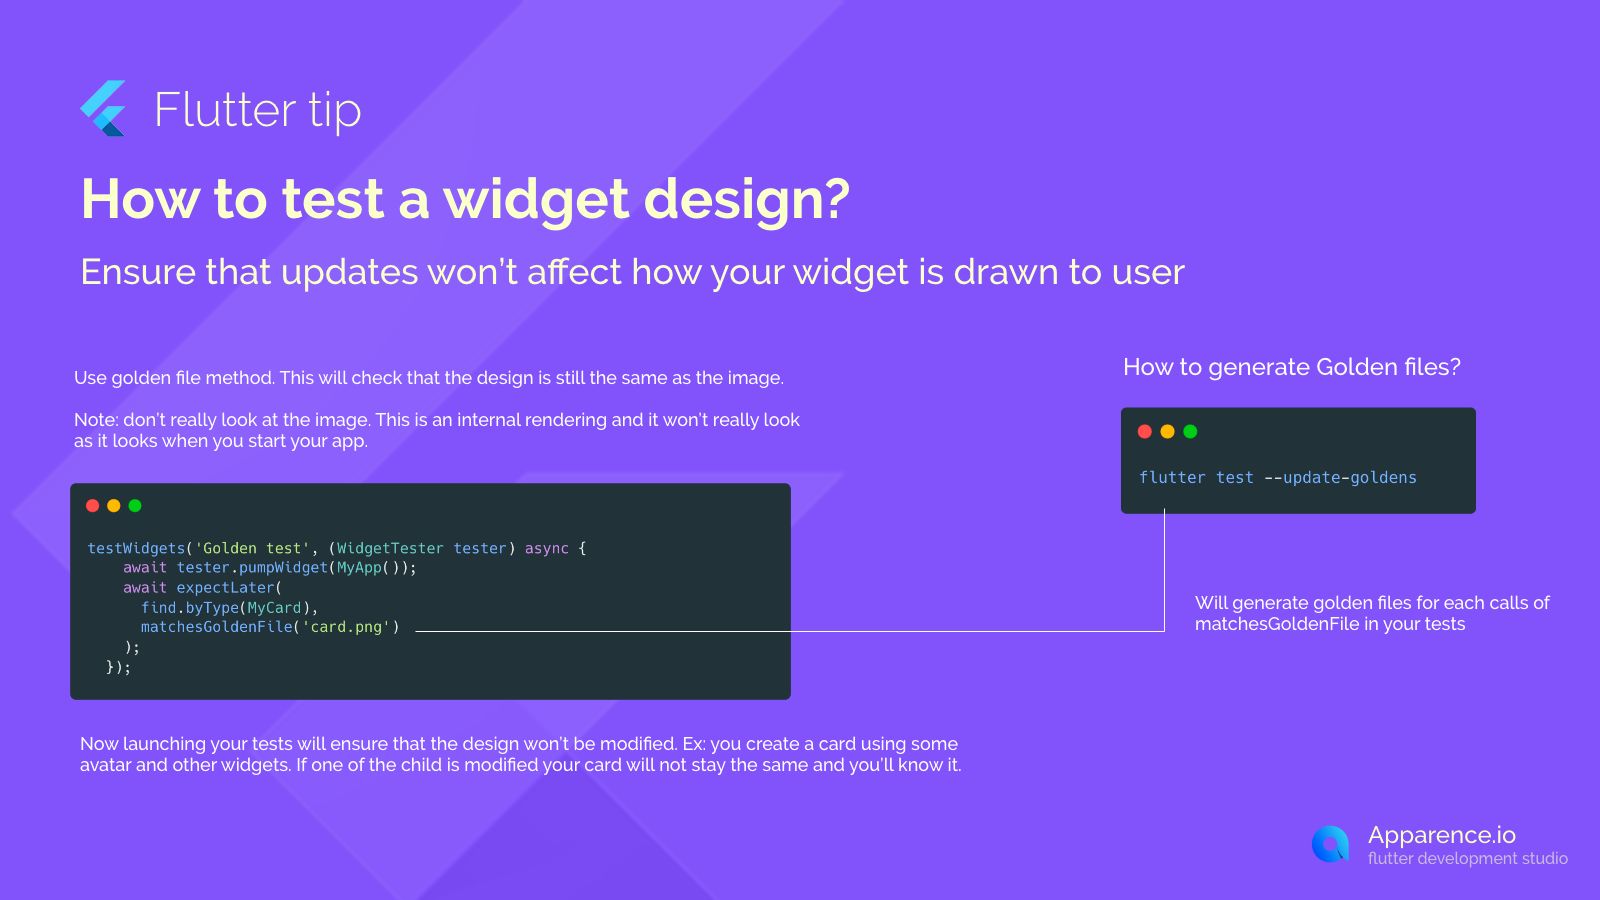
Use the Golden File Method
A great way to do this is using the golden file method in Flutter testing.
How it Works
This method takes a picture (like a snapshot) of your widget in a test environment. This picture is called a "golden file".
Your test then compares the current look of the widget to this saved golden file.
Important Note
The image created during the test is an internal rendering. It might not look exactly like it does when you run your app normally. This is okay, as the test's job is to ensure consistency in the rendering, not to perfectly replicate the final look on every device.
Generating Golden Files
To start using golden files, you first need to create them. Run this command in your terminal:
flutter test --update-goldensRunning this command will generate a golden file image for every time you call the matchesGoldenFile function in your tests.
Why This Helps
Once you have your golden files, running your tests again will check if the widget still looks the same as the saved image.
If the rendering changes (even slightly), the test will fail. This immediately tells you that an update has affected your design.
For example, if you have a complex card widget and you change something in a smaller widget inside it (like an avatar), the golden test for the card will fail, showing you the difference. This helps you catch unwanted visual changes easily.
Catch Design Breaks Early
Using golden tests is a simple yet powerful way to add a safety net for your app's design, ensuring a consistent user experience.