You may have found yourself searching for a flutter plugin on the largest library-sharing platform, pub.dev. Yet, despite your persistence in scrolling through the list, nothing seems to match your search... An idea suddenly crosses your mind...
What if it were YOU who would create that elusive plugin that only your mind is capable of imagining?
In addition to creating a plugin that will be useful for your wonderful applications, get ready to help others in the future 😇
At first glance, creating a Flutter plugin can seem intimidating.
In this article, we will break down this prejudice and show you that creating one is simple 👍.
This tutorial has been written with the aim of teaching you how to easily create a Flutter plugin that will allow you to retrieve battery information 🔋 on iOS (Swift) and Android (Kotlin) only.
Why create a Plugin / Package?
What we are going to create is a library that will allow us to encapsulate a maximum amount of logic and/or communicate directly with the device on the native side.

The main advantage of using a library is to make code reusable, allowing anyone to easily integrate our library into their own project, and thanks to the wonderful world of open source, contribute to its development and maintenance.
To get started, we first need to distinguish between a Plugin and a Package. They look almost identical from the outside, but the difference shapes everything that follows.
Plugin vs Package: the real difference ⚖️
Here is the one rule to remember:
All plugins are packages, but not all packages are plugins.
It's the very first question every Flutter dev asks before starting a library, and the answer comes down to whether you need native code or not.
A package is pure Dart. It can do anything Dart can do — state management, HTTP calls, parsing, business logic — but it never reaches into the operating system. Examples: bloc, mockito, http, intl, lint.
A plugin is a package that also ships native code. The native side talks to the platform APIs — battery, camera, sensors, notifications, file system, payment SDKs — and forwards results back to Dart. Examples: image_picker, flutter_native_splash, camerawesome, shared_preferences.
Concretely:
| Package | Plugin | |
|---|---|---|
| Contains Dart code | ✅ | ✅ |
| Contains native code | ❌ | ✅ |
| Calls platform APIs | ❌ | ✅ |
flutter.plugin in pubspec |
❌ | ✅ |
| Works on every Flutter target | Automatically | Only platforms you implement |
If you go the plugin route, you need at least basic knowledge of one native language per platform you want to support:
| Platform | Languages |
|---|---|
| iOS | Objective-C or Swift |
| macOS | Objective-C or Swift |
| Android | Java or Kotlin |
| Windows | C++ |
| Linux | C++ |
| Web | HTML/CSS/JS |
You can choose the language for each side independently — Swift on iOS but Java on Android, for example. The plugin template defaults to Swift + Kotlin, which is what we will use here.
Package, Plugin, FFI, or federated plugin?
Once you know you need native code, there are still three flavors of plugin to pick from. A quick decision tree:
- Pure Dart logic (parsing, state, algorithms) → ship a Package.
- Need a platform API (camera, sensors, push notifications, system services) → build a MethodChannel plugin — that's exactly what this tutorial covers.
- Need to bind to an existing C, C++, or Rust library (or you have CPU-bound work that should run synchronously without message-passing overhead) → use an FFI plugin — see the FFI section below.
- Targeting many platforms with very different native code (web + desktop + mobile) → use a federated plugin — see Multi-platform support.
The good news: these are not mutually exclusive. A serious plugin like camerawesome uses MethodChannel for control and FFI for image processing, and it's federated across iOS and Android. You can start small — one platform, one channel — and grow from there.
Let's Get Started 🤗!
Create a Flutter plugin step by step
- Create the project.
- Implement Dart-side methods.
- Implement tests.
- Implement iOS.
- Implement Android.
- Use the plugin in the example.
Creating the Project 😎
Execute the following command to create a new plugin project for iOS and Android:
flutter create --template=plugin --platforms=android,ios mybatteryplugin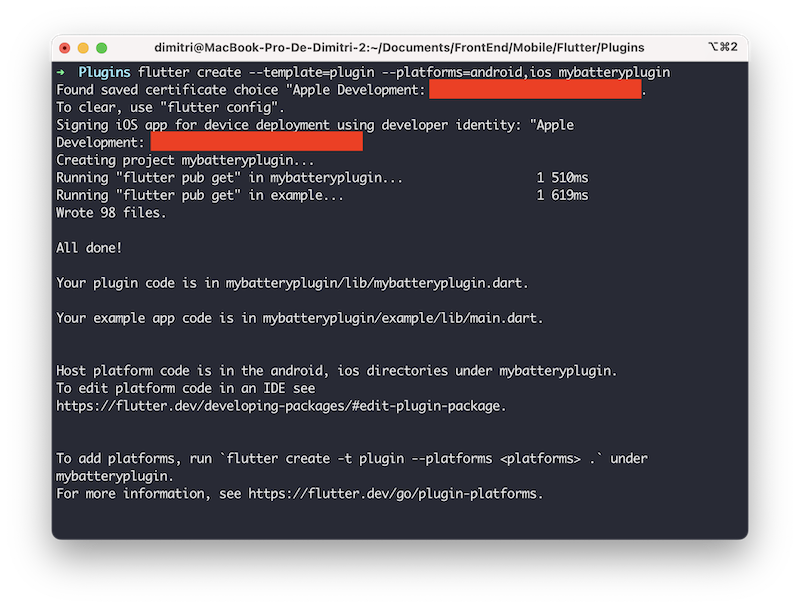
Note ℹ️: By default, Swift is used for iOS and Kotlin for Android. If you want to use another language, you can add the arguments -i objc to use Objective-C and -a java to use Java.

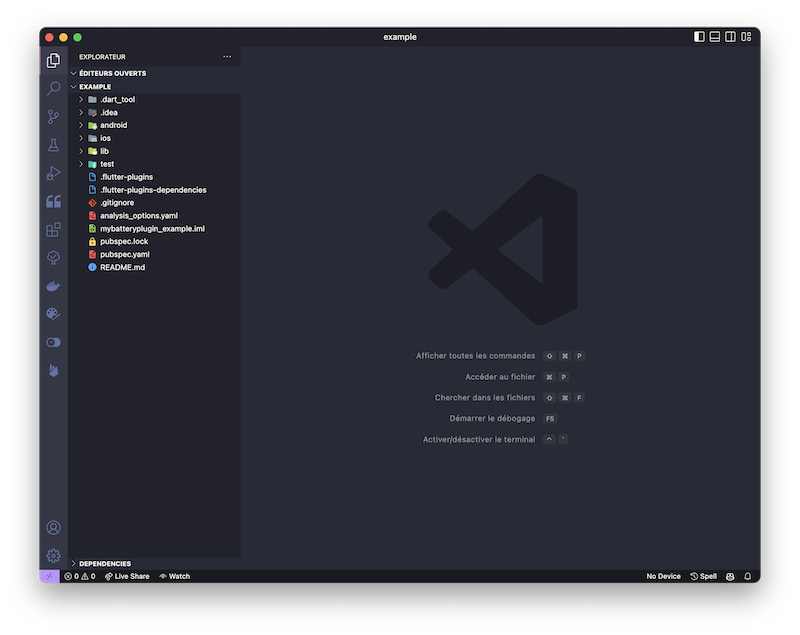
Open the newly created project in your favorite code editor (we will use VSCode here).
Several files are available, and here's a brief explanation of the purpose of the files you will need during development:
- android: Native files for Android (Kotlin code).
- example: A Flutter sample project that is useful for testing your plugin.
- ios: Native files for iOS (Swift code).
- lib: Dart code of the plugin.
- test: Various files related to testing the plugin.
- CHANGELOG.md: A list of all versions that will be released with associated changes. It's a markdown file.
- LICENCE: The license for your plugin. You can use choosealicense.com to find the one that suits you.
- pubspec.yaml: It contains information about your plugin and the various associated native classes.
- README.md: A useful markdown file for presenting your project, which will be displayed on pub.dev's first page.
Implementing Dart-side methods of your plugin
- Open the file
lib/mybatteryplugin_platform_interface.dart, let's add the definition of your method at the bottom of the markdown file.
abstract class MybatterypluginPlatform extends PlatformInterface {

  // [...]

  Future<num?> getBatteryLevel() {
    throw UnimplementedError('getBatteryLevel() has not been implemented.');
  }
}
We will now define the battery retrieval method. To do so, open the file lib/mybatteryplugin.dart. This method will be visible once the plugin is imported into the project.
class Mybatteryplugin {
  // [...]

  /// récupération du niveau de la batterie
  Future<num?> getBatteryLevel() {
    return MybatterypluginPlatform.instance.getBatteryLevel();
  }
}
Note ℹ️: It is highly recommended to add a comment with three "///" slashes to specify the role of your method.
And finally, we will edit the file lib/mybatteryplugin_method_channel.dart and insert the final implementation that will use the method channel to communicate with the native side.
class MethodChannelMybatteryplugin extends MybatterypluginPlatform {
// [...]
Future<num?> getBatteryLevel() {
return methodChannel.invokeMethod<num?>('getBatteryLevel');
}
}We're done with the Dart side, wasn't that easy? 😎

Implementing tests for your plugin 🧪
It's always a good idea to test your plugin to make sure it works as expected. A good application is an application that is tested! And so is a good plugin!
To do this, we will use the test folder.
Attention 🚨: By default, the template already includes an example based on the method
getPlatformVersion(), which will be entirely removed from the project in this tutorial.
Open the file test/mybatteryplugin_test.dart (it should be highlighted in red) and start by adding, at the top of the file, the mock related to our new method, and then implement the test in the main() method:
class MockMybatterypluginPlatform
with MockPlatformInterfaceMixin
implements MybatterypluginPlatform {
// [...]
// Here, we're overriding the getBatteryLevel() method to return a fixed value of 21,
// which will be tested in the following test.
Future<num?> getBatteryLevel() => Future.value(21);
}
void main() {
// [...]
// We're creating a new test to verify if the previously overridden value is returned correctly.
test('getBatteryLevel', () async {
Mybatteryplugin mybatterypluginPlugin = Mybatteryplugin();
MockMybatterypluginPlatform fakePlatform = MockMybatterypluginPlatform();
MybatterypluginPlatform.instance = fakePlatform;
expect(await mybatterypluginPlugin.getBatteryLevel(), 21);
});
}Now, open the file test/mybatteryplugin_method_channel_test.dart and modify it to replace the mock and the associated new test:
void main() {
  // [...]

  setUp(() {
    // We will add a new mock related to the Method Channel object
    // This will return the value of 21.
    channel.setMockMethodCallHandler((MethodCall methodCall) async {
      if (method.call == 'getBatteryLevel') {
        return 21;
      }
    });
  });

  // [...]

  test('getBatteryLevel', () async {
    expect(await platform.getBatteryLevel(), 21);
  });
}
Everything is okay 🤗, you should be able to run the command flutter test successfully!
Implementing iOS side of your plugin 🍏
Now, we need to run the installation of dependencies for the Xcode project using CocoaPods:
cd example/ios/
pod install --repo-update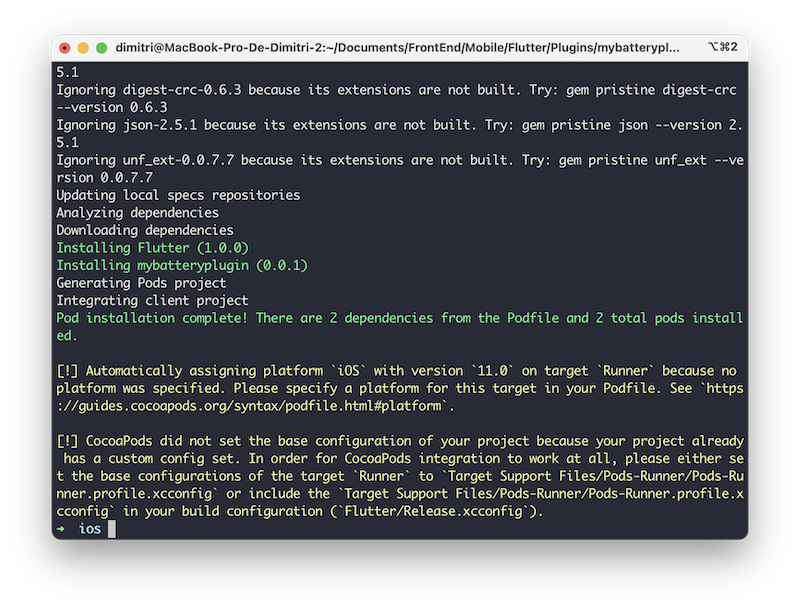
Note ℹ️: If you don't have CocoaPods installed, you can follow the instructions on the official website: https://cocoapods.org/
From this point on, we will be developing in Swift from Xcode.
However, it's also possible to continue using VSCode or other IDEs.
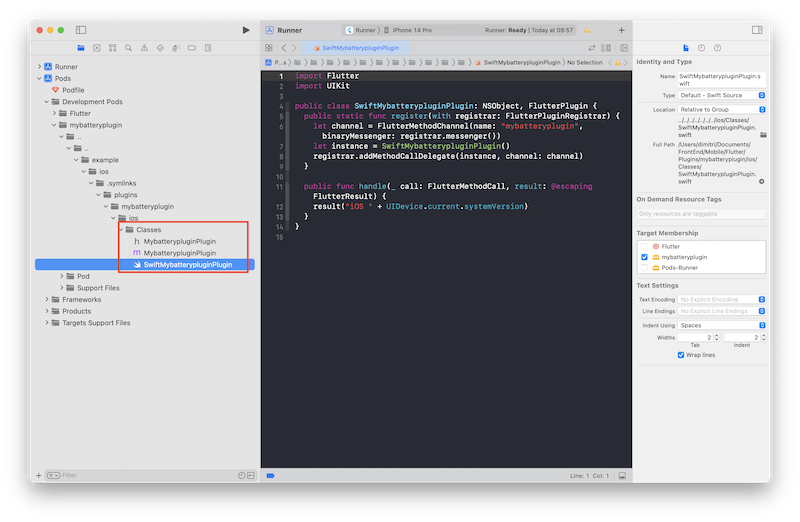
Now, open the file example/ios/Runner.xcworkspace with Xcode.
open Runner.xcworkspaceAttention 🚨: Make sure to open the .xcworkspace file and not the .xcodeproj file!
Note ℹ️: By opening the example project, you will be able to run your plugin on the sample project and debug the native code from Xcode, which is quite convenient!
In the sidebar, expand "Pods," do the same for "Development Pods," and so on for "mybatteryplugin."
Expand ".." and repeat the process by expanding the first item each time until you reveal 3 files.
Open the file SwiftMybatterypluginPlugin.swift
We will now add a switch statement inside the handle() method to detect a call to our method:
// [...]

public func handle(_ call: FlutterMethodCall, result: @escaping FlutterResult) {
  switch (call.method) {
    case "getBatteryLevel":
      // code natif
    default:
      result(FlutterError(code: "HANDLE_ERROR", message: "method not implemented", details: nil))
      break
    }
}
Modify the code that will allow us to retrieve the battery level:
// [...]

public func handle(_ call: FlutterMethodCall, result: @escaping FlutterResult) {
  switch (call.method) {
    case "getBatteryLevel":
      // il est nécessaire d'activer le suivi de la batterie avant
      UIDevice.current.isBatteryMonitoringEnabled = true

      // we return the battery level in percent
      result(UIDevice.current.batteryLevel * 100)
    default:
      result(FlutterError(code: "HANDLE_ERROR", message: "method not implemented", details: nil))
      break
    }
}
The iOS side of our flutter plugin is now complete! 🍏

Implementing Android side of your flutter plugin 🤖
Now, we will implement the Android side of our plugin.
In this section, we will use Android Studio, but it is entirely possible to continue using VSCode.
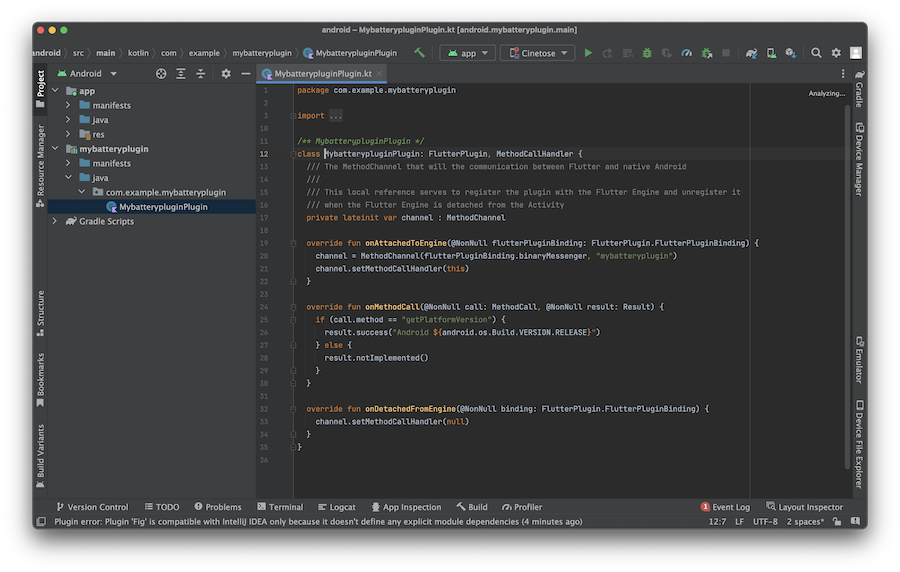
Open the project example/android/ using Android Studio.
Note ℹ️: By opening the example project, you will be able to run your plugin on the sample project and debug the native code from Android Studio, which is essential!

In the sidebar, expand mybatteryplugin, then java, and finally com.example.mybatteryplugin.
Open the file MybatterypluginPlugin.kt
We will now replace the contents of the onMethodCall() method with a switch statement to detect a specific call to our method:
// [...]

override fun onMethodCall(@NonNull call: MethodCall, @NonNull result: Result) {
    when (call.method) {
      "getBatteryLevel" -> {
        // native code
      }
      else -> {
        result.notImplemented()
      }
    }
  }
Let's add the battery manager that will allow us to retrieve the battery level later, and don't forget to import the dependencies.
class MybatterypluginPlugin: FlutterPlugin, MethodCallHandler {
  private lateinit var channel : MethodChannel
  private lateinit var batteryManager: BatteryManager // add this line

  // [...]
}
We will now instantiate the battery manager using the context from the plugin in the onAttachedToEngine() method.
// [...]

override fun onAttachedToEngine(@NonNull flutterPluginBinding: FlutterPlugin.FlutterPluginBinding) {
    channel = MethodChannel(flutterPluginBinding.binaryMessenger, "mybatteryplugin")
    channel.setMethodCallHandler(this)

    // Initialisation du battery manager
    batteryManager = flutterPluginBinding.applicationContext.getSystemService(Context.BATTERY_SERVICE) as BatteryManager
  }

// [...]
All that's left is to add the piece of code that will retrieve the battery level from the manager:
// [...]

override fun onMethodCall(@NonNull call: MethodCall, @NonNull result: Result) {
    when (call.method) {
      "getBatteryLevel" -> {
        if (Build.VERSION.SDK_INT >= Build.VERSION_CODES.LOLLIPOP) {
          result.success(batteryManager.getIntProperty(BatteryManager.BATTERY_PROPERTY_CAPACITY));
        } else {
          result.error("WRONG_VERSION", "android version not supported", "");
        }
      }
      else -> {
        result.notImplemented()
      }
    }
  }

// [...]
The Android side of our flutter plugin is now complete! 🤖

Using the plugin in the example 📱
Now that our plugin is complete, we will use it in the example project to test it.
The long-awaited moment is approaching! We can finally test our plugin 🤩
To do this, open the example project located in the example folder with VSCode.
Edit the file lib/main.dart and import your plugin (usually it's already imported):
import 'package:mybatteryplugin/mybatteryplugin.dart';In the default stateful widget created, we will instantiate and use the plugin:
class MyApp extends StatefulWidget {
const MyApp({super.key});
State<MyApp> createState() => _MyAppState();
}
class _MyAppState extends State<MyApp> {
// plugin instanciation
final _mybatterypluginPlugin = Mybatteryplugin();
// this is where we will store the battery level
num? _batteryLevel;
void initState() {
super.initState();
// execute the method to retrieve the battery level
_mybatterypluginPlugin.getBatteryLevel().then((batteryLevel) {
setState(() {
_batteryLevel = batteryLevel;
});
});
}
Widget build(BuildContext context) {
return MaterialApp(
home: Scaffold(
body: Center(
// we display the battery level
child: _batteryLevel != null
? Text('Niveau de la batterie: $_batteryLevel')
: const CircularProgressIndicator(),
),
),
);
}
}It's now complete! 🤩

Going further: FFI plugins ⚡
Everything we just built relies on a MethodChannel, which is Flutter's classic way of talking to native code. It's flexible and easy to debug, but every call gets serialized, sent across an asynchronous boundary, and deserialized on the other side. For a one-shot battery-level read that's invisible. For a tight loop processing audio, video, or large buffers, that overhead adds up fast.
That's where FFI plugins come in. FFI (Foreign Function Interface) is part of dart:ffi, stable since Flutter 3.0. Instead of message-passing, your Dart code calls C/C++/Rust functions directly, in the same isolate, with zero copying for primitive types.
Scaffold one with:
flutter create --template=plugin_ffi --platforms=android,ios myffipluginThe generated project ships a tiny src/myffiplugin.c file, and Dart bindings generated by ffigen. You point ffigen at a .h header file in ffigen.yaml and it produces typed Dart bindings automatically — you never write the binding glue by hand.
When should you reach for FFI?
- Wrapping an existing C/C++/Rust library — image codecs, ML inference, crypto, audio DSP. No reason to rewrite all of it in Dart.
- CPU-bound hot paths — anything you'd profile and find spending time in
MethodChannelserialization. - Synchronous native calls — FFI calls return immediately, while
MethodChannelalways returns aFuture.
When should you stick to MethodChannel?
- You need platform APIs —
UIDevice.current.batteryLevel,Camera,NSNotificationCenter. FFI can't reach into Swift/Kotlin runtime, only into C-ABI libraries. - You're already async — for one-off calls, the overhead is negligible and MethodChannel is dramatically easier to debug.
Rule of thumb: MethodChannel for platform features, FFI for native compute. Many real plugins ship both.
Multi-platform support: web, macOS, Windows, Linux 🌍
Flutter doesn't stop at iOS and Android. Your plugin can run on six targets, but unlike a pure Dart package you have to opt in explicitly — and write native code for each.
The mechanism is the flutter.plugin.platforms block in your pubspec.yaml:
flutter:
  plugin:
    platforms:
      android:
        package: io.apparence.mybatteryplugin
        pluginClass: MybatterypluginPlugin
      ios:
        pluginClass: MybatterypluginPlugin
      macos:
        pluginClass: MybatterypluginPlugin
      web:
        pluginClass: MybatterypluginWeb
        fileName: mybatteryplugin_web.dart
      windows:
        pluginClass: MybatterypluginPluginCApi
      linux:
        pluginClass: MybatterypluginPlugin
Each entry tells Flutter which class to instantiate when your plugin is registered on that platform. You only declare the platforms you actually support — shipping with just android and ios is perfectly fine, and you can add more later in a minor version bump.
What changes per platform:
- iOS / macOS — Swift or Objective-C. macOS reuses most of the iOS code, so adding it after iOS is usually an afternoon's work.
- Android — Kotlin or Java. No surprises if you came from the iOS section.
- Web — Dart calling JavaScript through
dart:js_interop(the modern replacement fordart:html/package:js). No Swift, no Kotlin — you wrap the browser API. - Windows / Linux — C++ with CMake. Heavier setup than mobile, but the platform-channel API is the same shape.
For larger plugins, the community has settled on the federated plugin pattern. Instead of one giant package, you split it into:
myplugin— the app-facing API.myplugin_platform_interface— the abstract contract.myplugin_android,myplugin_ios,myplugin_web, … — one implementation per platform, each shipped as its own package.
Why the split? It lets the community contribute a myplugin_linux without touching the main repo, and it lets you bump only the platforms that changed. The official plugins under flutter/packages (video_player, path_provider, shared_preferences) all use this pattern — read their pubspec.yaml if you want a real-world template.
You don't need to start federated. Begin as a single-package plugin like the one we just built; if you outgrow it, the migration is mechanical.
Testing your plugin properly 🧪
We already wrote two test files inside the tutorial: a unit test that mocks the platform interface, and a method-channel test that mocks the channel. Those cover the Dart side, but they say nothing about whether your actual Swift or Kotlin code works. A real plugin needs four layers.
1. Unit tests — what we wrote in test/mybatteryplugin_test.dart. You override MybatterypluginPlatform.instance with a mock and verify your Dart-side logic. Fast, runs on every push.
2. Method-channel tests — what we wrote in test/mybatteryplugin_method_channel_test.dart. You install a mock channel handler and check that your Dart code sends the right method names with the right arguments. Still fast, still pure Dart.
3. Integration tests — the only layer that exercises real native code. Create an integration_test/ folder inside example/, add integration_test to dev_dependencies, and write tests that drive the example app on a real device or simulator:
// example/integration_test/plugin_test.dart
import 'package:flutter_test/flutter_test.dart';
import 'package:integration_test/integration_test.dart';
import 'package:mybatteryplugin/mybatteryplugin.dart';

void main() {
  IntegrationTestWidgetsFlutterBinding.ensureInitialized();

  testWidgets('reads a real battery level', (tester) async {
    final plugin = Mybatteryplugin();
    final level = await plugin.getBatteryLevel();
    expect(level, isNotNull);
    expect(level, inInclusiveRange(0, 100));
  });
}
Run it from the example/ folder:
flutter test integration_test/This is the test that catches the broken Swift method, the missing Android permission, the typo in the channel name. Don't ship a plugin without it.
4. Native tests — for non-trivial Swift or Kotlin logic, write XCTest cases inside example/ios/RunnerTests/ and JUnit cases inside example/android/app/src/test/. Run them from Xcode and Android Studio respectively. They catch bugs that never make it across the channel.
For CI, run all four layers on every push: unit and channel tests on Linux, integration tests on macOS (iOS simulator) and Linux (Android emulator), native tests on each platform's native runner. GitHub Actions' flutter and swift runners cover everything you need.
Publishing your plugin on pub.dev 🚀
pub.dev is the official package registry — and it's how you'll distribute your plugin to thousands of Flutter developers, for free. Google ranks results by quality signals, so a well-scored plugin shows up higher in search and gets more downloads.
Score it first with pana
Every package is graded on a 160-point scale. The score is computed by a bot after publication, but you can run the same analyzer locally — it's called pana.
The points break down across six categories:
- Follow Dart file conventions —
pubspec.yaml,README.md,CHANGELOG.md, license file present and well-formed. - Provide documentation — public API documented, working example in
example/. - Platform support — declares the platforms it supports in
pubspec.yaml. - Pass static analysis — no
dart analyzewarnings under the package's own analysis options. - Support up-to-date dependencies — depends on current major versions, supports the current Dart SDK.
- Support sound null safety — opted into null safety with a Dart 2.12+ lower bound.
Install pana and run it from your project root:
dart pub global activate pana
dart pub global run pana .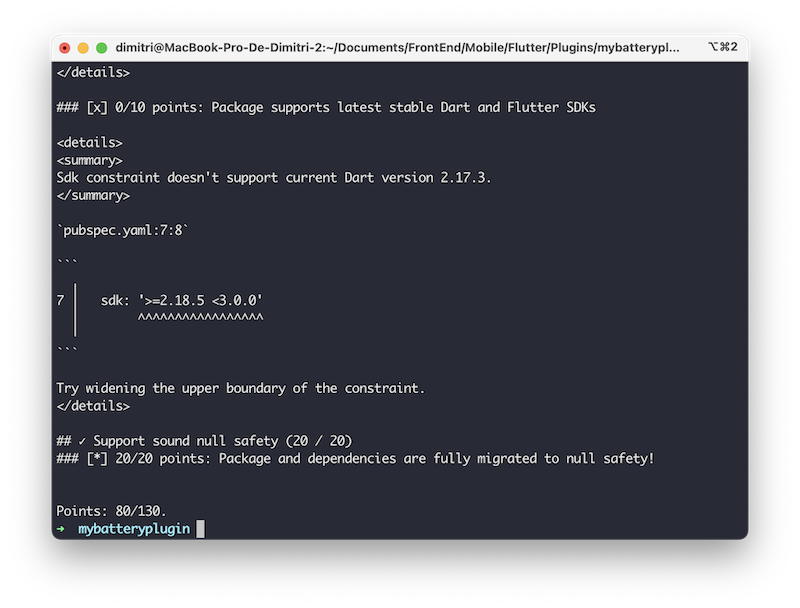
Note ℹ️: pana can modify files (e.g. format Dart code), so commit or stash your changes before running it.
Fix every issue it surfaces. The closest you get to 160/160 before publishing, the better your plugin will rank.
Version, changelog, and dry-run
Before pushing the publish button, get three things right:
- Semantic versioning in
pubspec.yaml.0.x.yfor pre-stable,1.0.0once you commit to a stable API. Bump the major on breaking changes — pub.dev surfaces a "breaking" badge when you do, and downstream apps get an explicit warning. - CHANGELOG.md. pub.dev parses it and shows it on the package page. The first heading must match the version you're publishing (
## 1.0.0), or pana will complain. - Dry-run. Always validate the publish first:
dart pub publish --dry-runIt runs every check that the real publish runs, but uploads nothing. Fix every warning before the real run.
Publish
Sign in to pub.dev with your Google account, then ship it:
dart pub publish
Note ℹ️:
flutter pub publishworks too — it's the same command routed through the Flutter CLI.
Verified publisher and updates
Once your plugin is live, two extras are worth the effort:
- Verified publisher badge. Add a DNS TXT record on a domain you control, then claim the publisher in your pub.dev account settings. Plugins published under a verified publisher show a green check next to the package name and get a small ranking boost.
- Updating a published version. Bump
versioninpubspec.yaml, add a## x.y.zentry toCHANGELOG.md, then re-rundart pub publish. There is no "unpublish" — pub.dev policy keeps every version online forever. The closest thing isdart pub retract, which works within seven days of publishing and leaves the version visible but flagged so users avoid it.
That's it — your plugin is now part of the Flutter ecosystem. 🎉
Conclusion
You have just created your first plugin for iOS and Android, allowing you to interact with the device's native features.
Now it's your turn to come up with the best plugin idea and let your imagination run wild 😁
Sources
- Developing packages & plugins — Flutter docs
- Binding to native code using dart:ffi
- ffigen — generate Dart FFI bindings from C headers
- Federated plugins — Flutter docs
- Plugin testing — integration_test package
- Publishing packages — dart.dev
- pub.dev scoring & pub points
- How to read the battery level on iOS — Hacking with Swift