Gitlab CI/CD setup for Flutter app
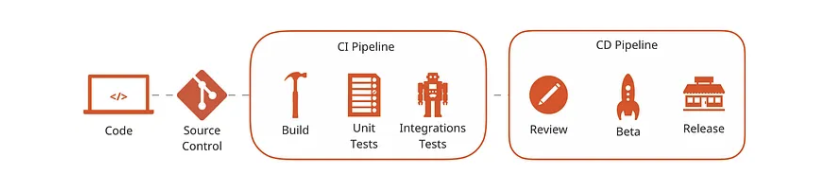
Continuous Integration (CI) is one of the most common development practices used in software development. Modern continuous integration tools enable development teams to have more confidence, by automatically building and testing and also providing earlier feedback.
Continuous delivery (CD) is the step after Continuous Integration. Your application is not only built and tested at every code change pushed to the codebase, but as an additional step, it’s also deployed continuously, though the deployments are triggered manually.
As we needed to do a lot of build for our clients, we decided to use gitlab CI on our own machine to build our apps automatically and reduce our cost.
But if you are alone on your project, you can use Codemagic to build your app automatically.
This is way easier to setup.
This guide will help you to setup your CI to build your app for iOS and Android.
This took me a lot of time to setup it correctly, so I hope it will help you.
Still you have some work to do to adapt it to your project.
Note: You can setup the first steps on GItlab then use a dedicated mobile CI like Codemagic to build your app. This could look like
- check lint and run tests on Gitlab CI
- build your app on Codemagic
- deploy your app on Codemagic
Prerequisites
First you must understand that to build an iOS app you need a Mac. So the best solution is to have a Mac with a Gitlab runner installed on it. A runner is a service that will run your CI jobs automatically.
You can follow this guide to install a Gitlab runner on your Mac.
Using a pre-installed runner
Now gitlab also provides pre-installed runners on Mac. You can use them if you don't have a Mac or if you don't want to install a runner on your Mac. Check it here
But you will have to pay for it... SaaS runners on macOS are in Beta for open source programs and customers in Premium and Ultimate plans.
Install dependencies on your own Mac
then you have to Install
- Homebrew: install it
- Gitlab runner:
brew install gitlab-runner - Install flutter on your Mac: install it Or use the flutter docker image to build your app.
- Install fastlane:
brew install fastlane - Install cocoapods:
brew install cocoapods - Install ruby:
brew install ruby - Install Android SDK: install it
- brew cask install android-sdk
- brew cask install adoptopenjdk8
- update your .bash_profile with the following lines:
export ANDROID_HOME=/usr/local/share/android-sdk
export ANDROID_SDK_ROOT=/usr/local/share/android-sdk
export JAVA_HOME=/Library/Java/JavaVirtualMachines/adoptopenjdk-8.jdk/Contents/Home
export PATH=$PATH:$ANDROID_HOME/tools:$ANDROID_HOME/platform-tools
- accept licences
flutter doctor --android-licenses
- Install Xcode: install it
or
gem install xcode-install - Install Xcode command line tools:
xcode-select --install
As you see there is a lot of things to install, but don't worry, you will have to do it only once.
Note that you will regularly have to update Flutter and Xcode manually or create a script to do it.
Setup your Gitlab CI
Once your CI has been correctly installed, you can create a .gitlab-ci.yml file at the root of your project.
(One is already present in this repository showing you how to build your app for iOS and Android)
It is splitted in multiple stages:
- Setup (install dependencies)
- Test (run tests)
- Build (build your app for each environment and platform)
- Deploy (deploy your app on the store or pushing it to a server)
Install flutter dependencies
- Cider to manage the app version and build number
Generate the Gitlab configuration
To generate the GItlab CI configuration, run the following command:
dart pub global run apparence_cli ci --provider=gitlab .