Setup ApparenceKit with Supabase
ApparenceKit will help you bootstrap your flutter app with authentication, monetization, theme, internationalization...
It's fully working with Supabase.
To make your life easier, we created a CLI that will generate tons of code for you depending on your needs.
Here is a step by step guide to setup your app with ApparenceKit and Supabase.
Note: Even if you use Supabase we still require Firebase for push notifications and remote config. As Supabase doesn't provide this
Installation video demo guide
Prerequisites
You must have installed
1 - Generate your app
ApparenceKit CLI will generate tons of code
Open a terminal and run the following command in the root of your project:
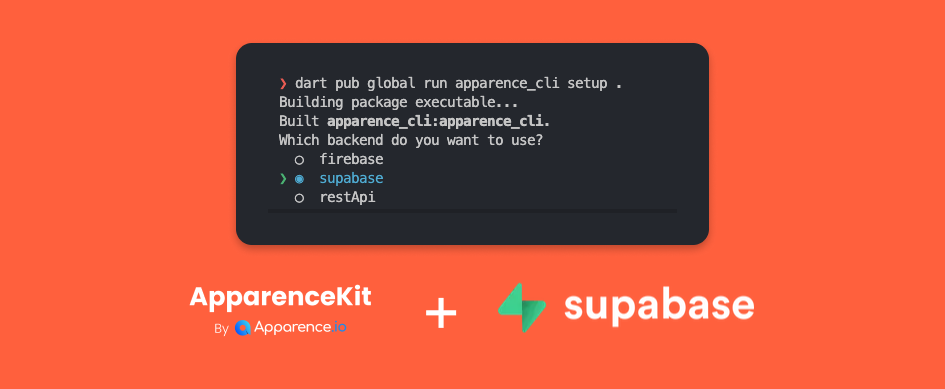
apparence_cli setup . You will be asked to choose between using Firebase or Supabase or Http Client.
Choose Supabase then press enter.
You will also be asked about
- Using Sentry for error reporting
- Using Firebase Remote Config for A/B testing
- Using Mixpanel for analytics
- Adding Internationalization
- Adding introduction screens ...
Then run the following command to setup your Supabase project
apparence_cli supabase .where . is the root of your flutter project generated by the previous command.
2 - Setup Supabase (manual setup)
For this you must have a Supabase account and a project.
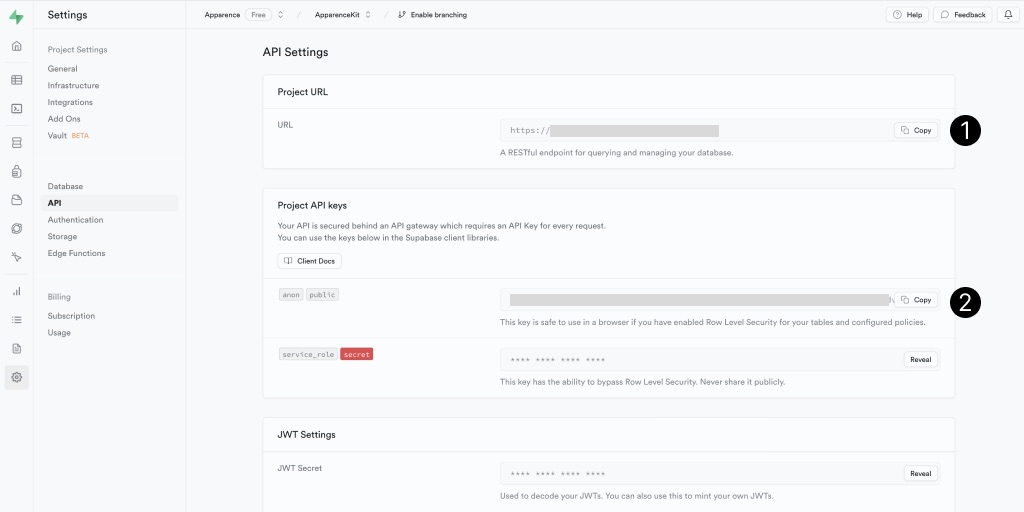
- Your Supabase project url
- Your Supabase project token
Using VSCode
Open the '.VSCode/launch.json' file and add your Supabase project url and token in the 'args' section.
...
    {
        "name": "Supabase - Development",
        "request": "launch",
        "type": "dart",
        "program": "lib/main.dart",
        "args": [
            "--dart-define=ENV=dev",
            "--dart-define=BACKEND_URL=", // 1 - Your Supabase project url
            "--dart-define=SUPABASE_TOKEN=", // 2 - Your Supabase project token
        ]
    },
Using command line
Run the following command in the root of your project:
flutter run --dart-define=ENV=dev \
--dart-define=BACKEND_URL=YOUR_SUPABASE_PROJECT_URL \
--dart-define=SUPABASE_TOKEN=YOUR_SUPABASE_PROJECT_TOKEN
Directly in your code (not recommended)
Open the 'lib/main.dart' file
await env.map(
    dev: (_) => Supabase.initialize(
      url: env.backendUrl, // 1 - Your Supabase project url
      anonKey: const String.fromEnvironment('SUPABASE_TOKEN'), // 2 - Your Supabase project token
    ),
    prod: (vars) => Supabase.initialize(
      url: env.backendUrl, // 1 - Your Supabase project url for production
      anonKey: const String.fromEnvironment('SUPABASE_TOKEN'), // 2 - Your Supabase project token for production
    ),
);
🔥 ApparenceKit V5 now provides you a command to completely setup your supabase project
apparence_cli supabase .Follow the instructions to setup your supabase project automatically.
👇 You don't have to do this anymore
3 - Setup Supabase server - authentication providers
In order to use any provider you have to enable it in your Supabase project.
Email and password provider
Go to your Supabase project > authentication > providers and enable the email and password provider.
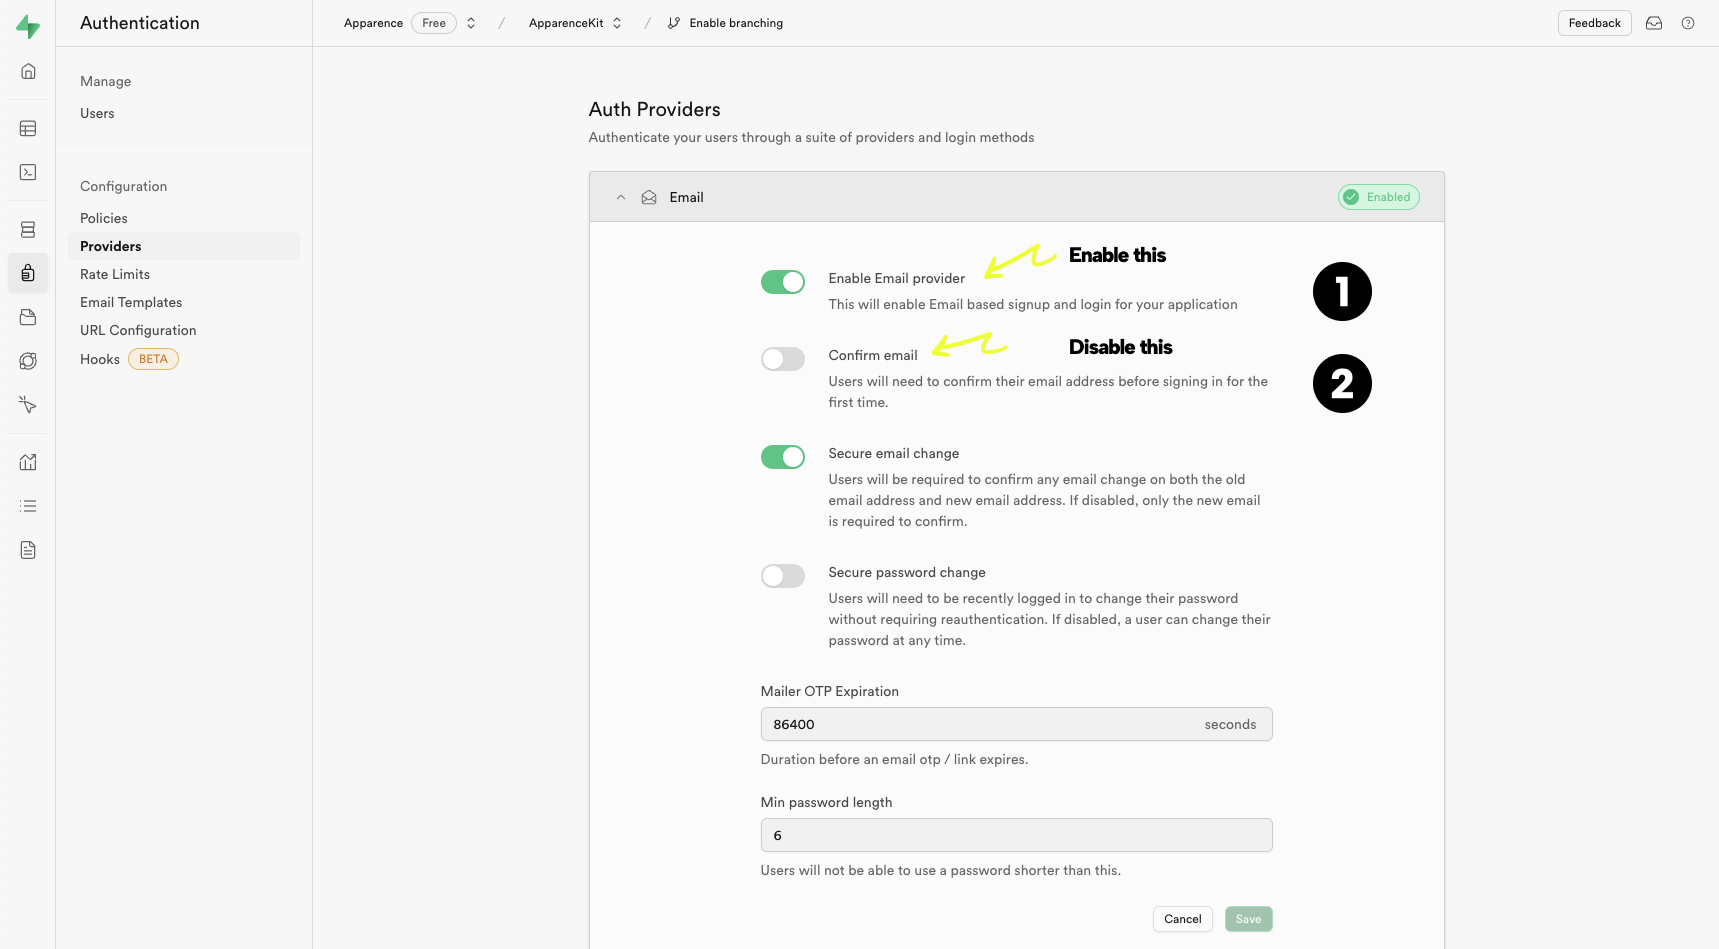
- Enable the email and password provider
- Disable the confirm email (In most case, you don't want to a new users to quit your app to confirm their email. This is a bad user experience and will lead to many users getting distracted and never coming back to your app)
4 - Setup your database
Depending on the features you chose, ApparenceKit will require some tables in your database.
You can run the following command to create them in your Supabase project.
Deploy database schema
When you purchase ApparenceKit you have access to the Supabase boilerplate repository.
Since the launch of V5, we added a new command to the CLI that will generate all the SQL queries to setup your database based on the features you chose during the setup.
The SQL is provided in the supabase folder of your project.
The command also deploy the database schema for you, so you don't have to do anything.
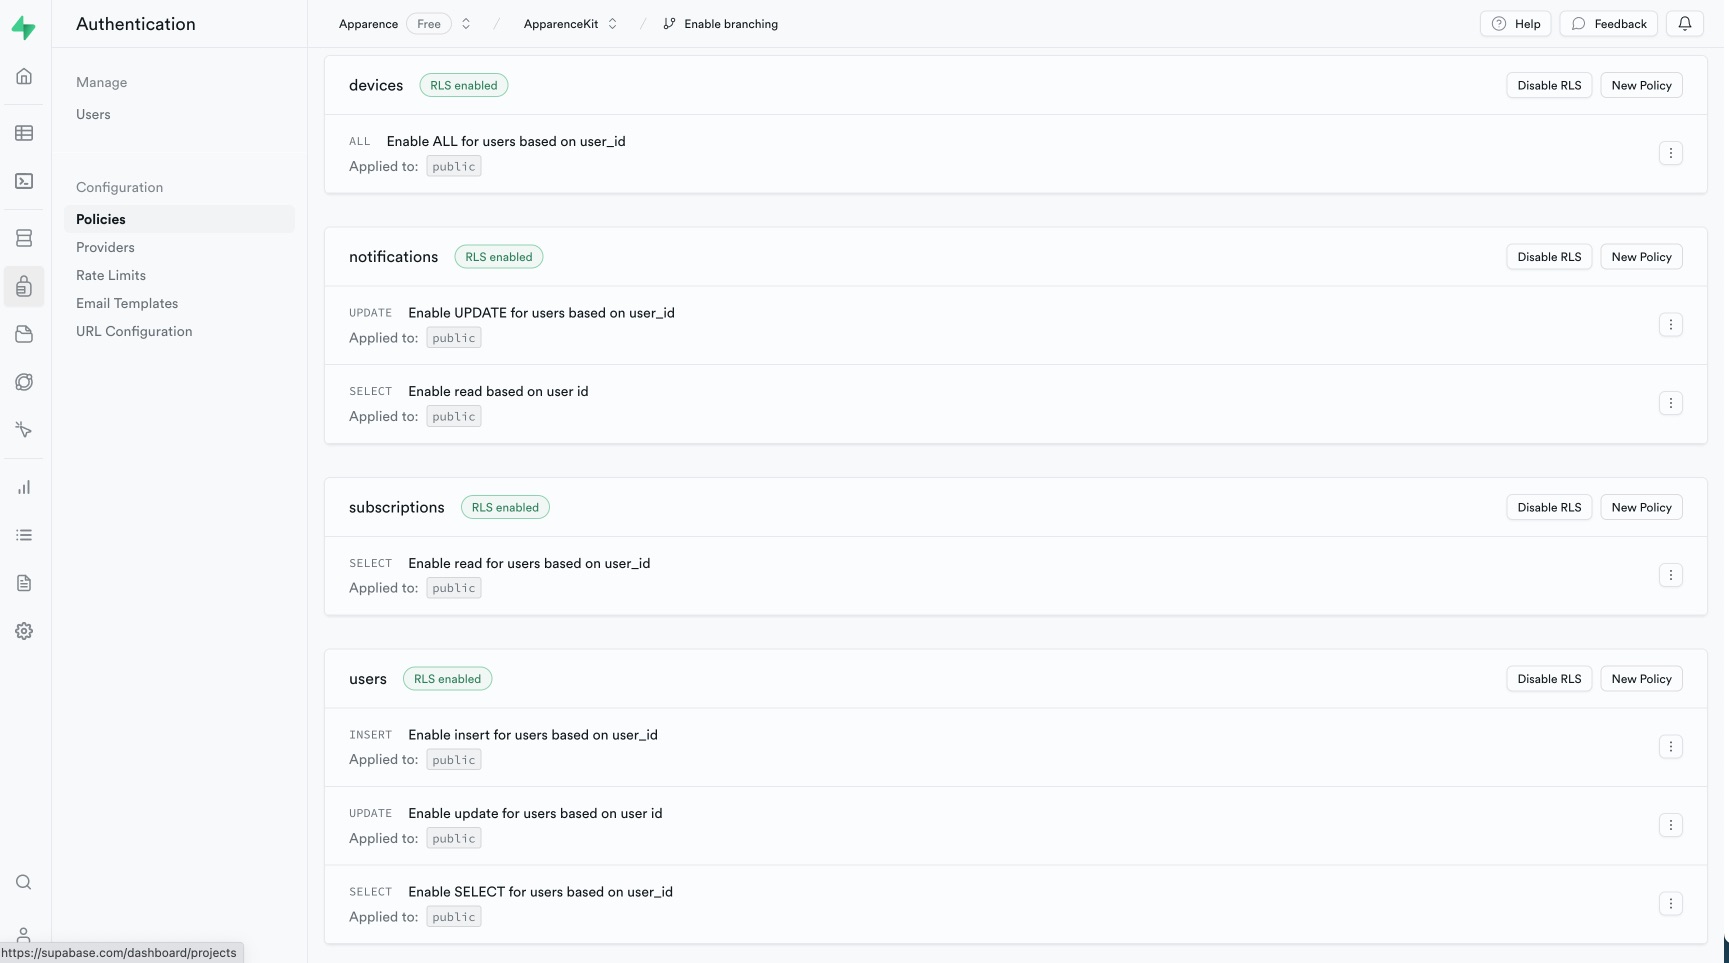
Table policies
Policies are used to manage access to your database.
Without them, your users won't be able to access their data.
If you are new to Supabase, you can read more about database policies here.
💡 The previous database schema will also create the policies for you.
Here is the result:
4 - Setup firebase for notifications or remote config
ApparenceKit uses Firebase Cloud Messaging to send notifications to your users.
So you need to install the firebase_tools
We need firebase for the push notifications or remote config.
- Google force us to create a project for Android application
- Firebase allows us to send push notifications to iOS and Android devices
You must first create a firebase project here
Install firebase cli
On Mac, you can install it with
brew install firebase-cliOr with npm
npm install -g firebase-toolsCheck the official documentation for other OS.
Login to firebase
firebase loginFlutterfire cli
Flutter fire cli is a tool to generate firebase configuration files with flutter.
Install it with
dart pub global activate flutterfire_cliConfigure your project (dev environment here)
# flutterfire configure --project=YOUR_PROJECT_NAME --out lib/firebase_options_[environment].dart
# Ex:
flutterfire configure --project=apparencekit-pro --out lib/firebase_options_dev.dart
This will output a configuration file into your lib folder.
Create as many environments as you need.
Remove firebase generated files
I recommend you to remove any firebase generated files from Android / iOS folders.
Flutter recently added a new way to configure firebase, relying on dart code.
- remove the google-services.json file from the android/app folder
- remove the GoogleService-Info.plist file from the ios/Runner folder
Setup firebase
import 'package:apparence_kit/firebase_options_dev.dart' as firebase_dev;
...
void main() async {
    ...
    await env.when(
        dev: (_) => Firebase.initializeApp(
            options: firebase_dev.DefaultFirebaseOptions.currentPlatform,
        ),
        ...
    );
}
5 - Deploy RevenueCat webhook
ApparenceKit uses RevenueCat to manage in-app purchases.
You must deploy a webhook to your server to sync the purchases with your database.
It is provided within the supabase folder generated by the command apparence_cli supabase . command.