Create flavors for your flutter app
What is flavor?
Flavor is a set of features that are compiled into your app. For example, you can have dev flavor that will have some features that are not available in prod flavor. Or you can have qa flavor that will have some features that are not available in dev and prod flavors.
You can also have prod flavor that will have some features that are not available in dev and qa flavors.
But using flutter flavors won't give you that much flexibility because our code is on the flutter side.
Flavors will allow you to have different app icons, app name, bundle id, etc. for each flavor.
ℹ️ Flavors are an advanced feature that you should use it only if you know what you are doing and really need it. If you are not sure, you probably don't need it.
Android flavors
To add a new flavor, you need to open android/app/build.gradle file and find the following code:
       flavorDimensions "release-type"

       productFlavors {
           dev {
               dimension "release-type"
               applicationIdSuffix ".dev"
               versionNameSuffix "-dev"
           }
           prod {
               dimension "release-type"
           }
       }
You have to add your custom flavor to the productFlavors section. For example:
       flavorDimensions "release-type"

       productFlavors {
           dev {
               dimension "release-type"
               applicationIdSuffix ".dev"
               versionNameSuffix "-dev"
           }
           prod {
               dimension "release-type"
           }
           qa {
               dimension "release-type"
               applicationIdSuffix ".qa"
               versionNameSuffix "-qa"
           }
       }
You also can create directory for your flavor in android/app/src directory. For example, if you have files that are used only in your flavor (e.g. launch icons, splash, app name, etc), you can create directory qa in android/app/src and put your files there.
iOS flavors (named schemes in Xcode)
-
Open
Runner.xcworkspacein Xcode -
Create a new configuration file in
ios/Flutterand name it after your flavor name: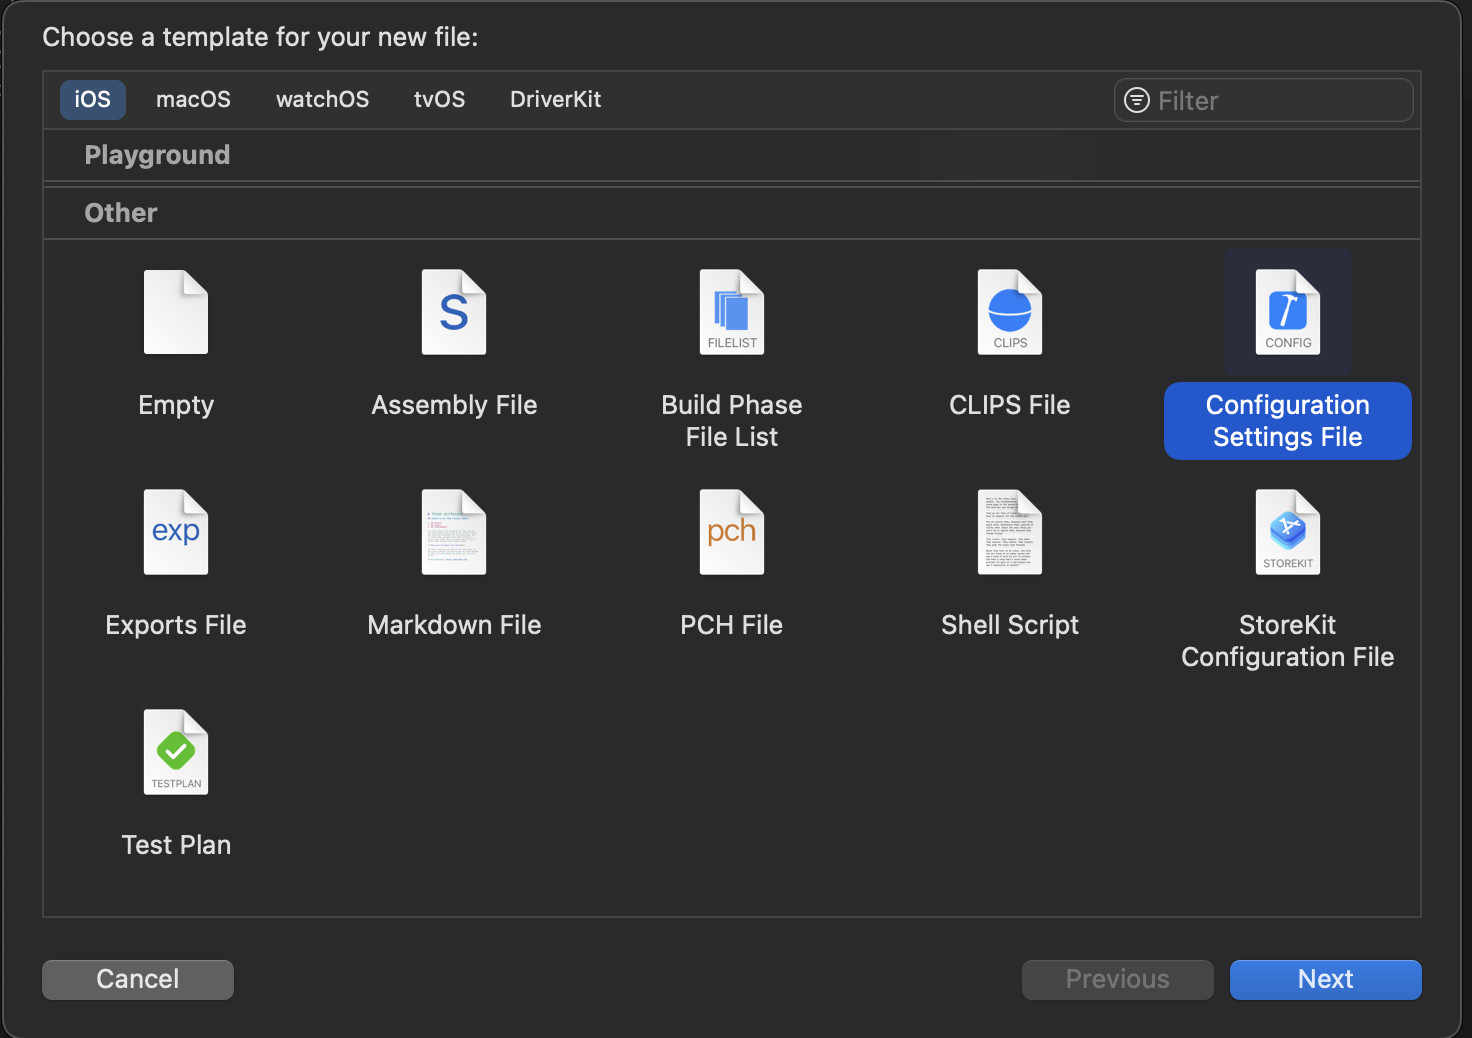
Make sure that you have
Runnertarget selected and your file will be placed inFlutterfolder: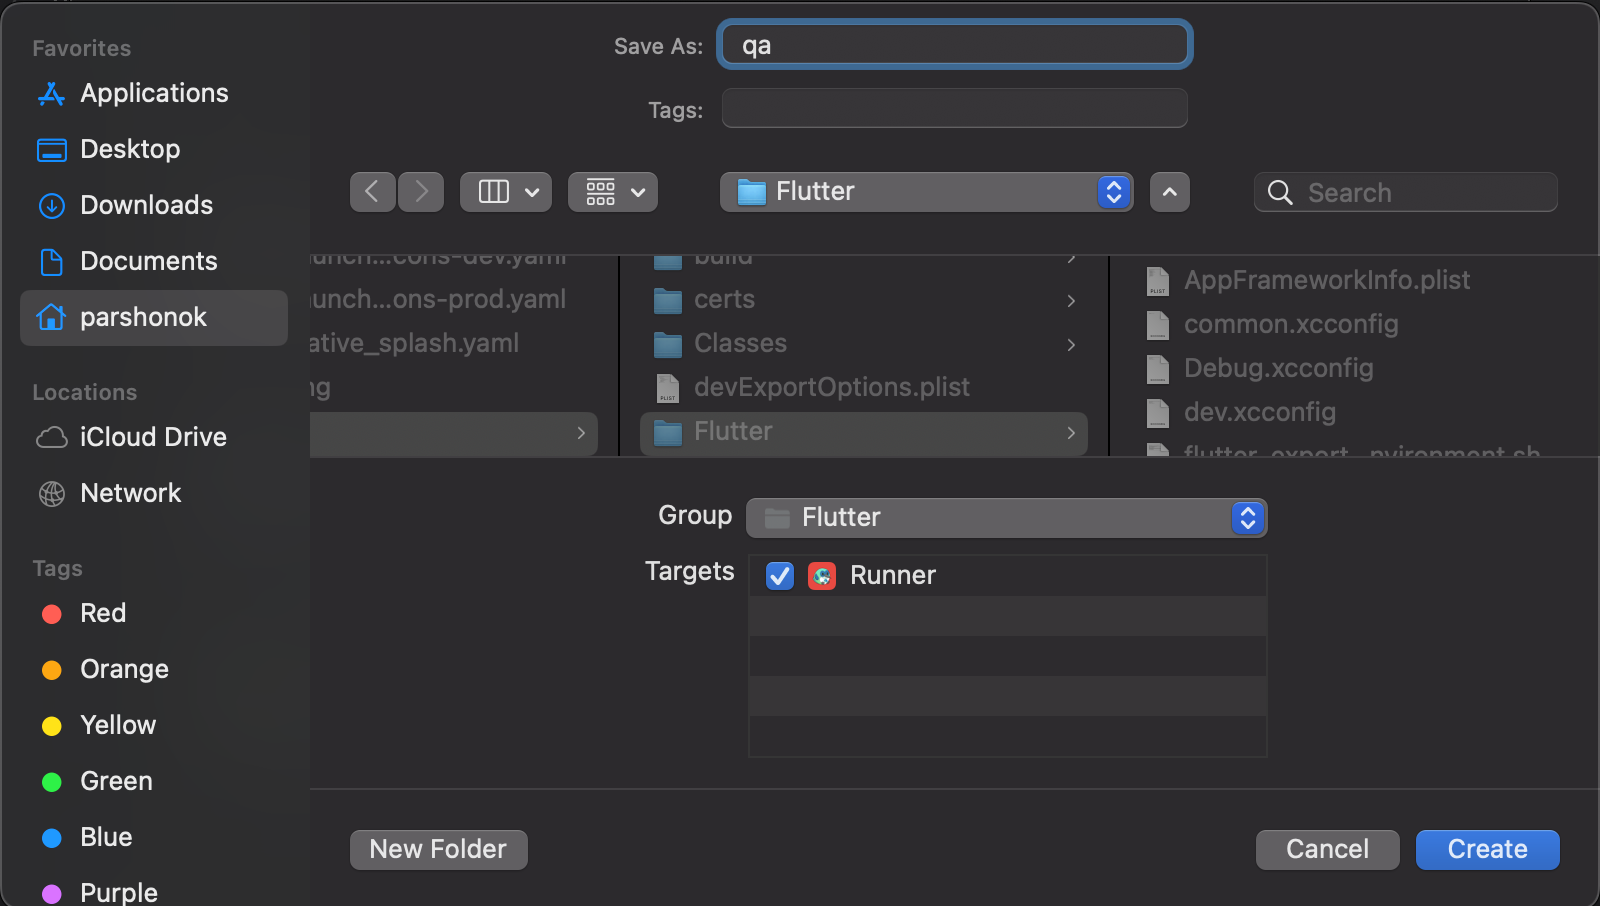
-
Paste the following code into your configuration file:
    #include "Pods/Target Support Files/Pods-Runner/Pods-Runner.qa.xcconfig"
    #include "Generated.xcconfig"
    #include "common.xcconfig"

    app_icon_suffix=-qa
    bundle_suffix=.qa
    IDENTIFIER=$(identifier)$(bundle_suffix)
    APP_ICON=$(app_icon)$(app_icon_suffix)
Replace
qawith your flavor name.
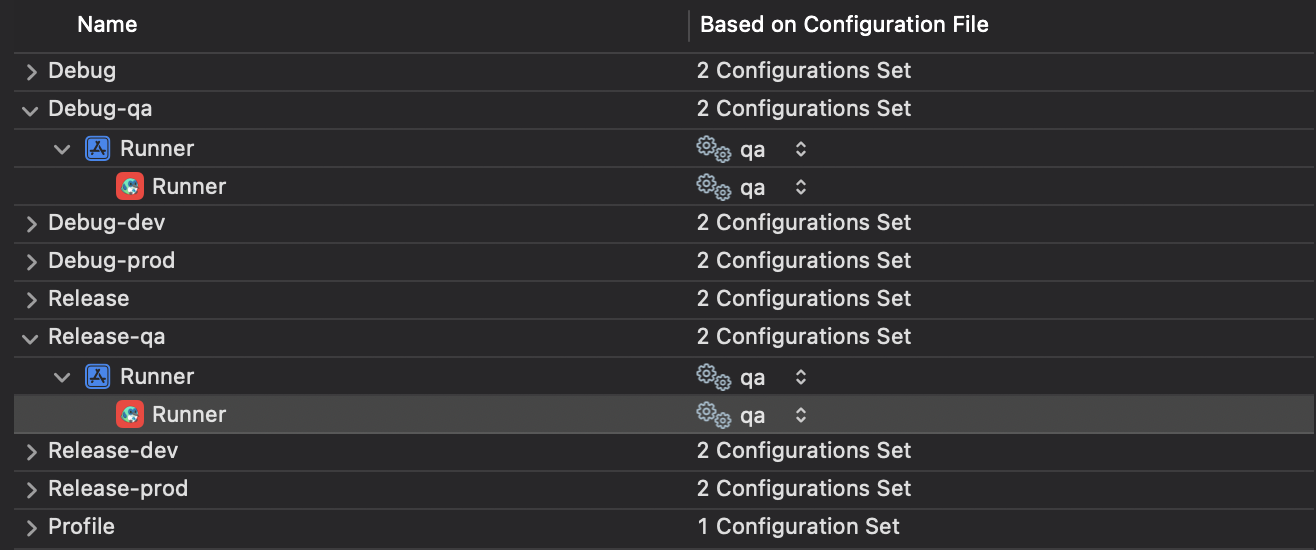
- Go to Runner -> Project -> Runner -> Info and duplicate configurations
(Debug, Release, Profile (if you need it)) for your new flavor. Postfix for your new configuration should be the same as your flavor name. In our case it is qa. So, we'll have Debug-qa, Release-qa, Profile-qa. You also should set correct configuration files for each of your new configuration.
In the end you should have something like this:
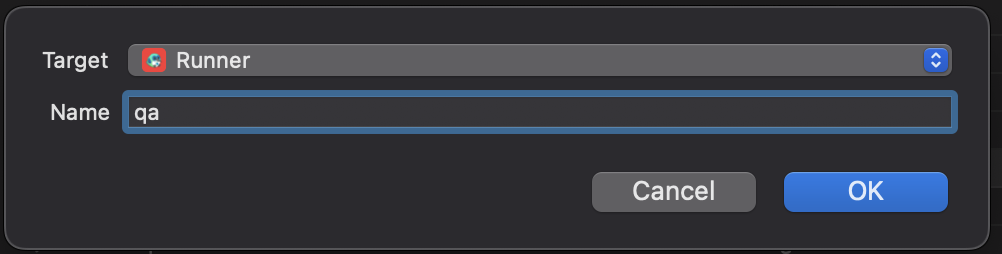
- Go to
Product -> Scheme -> New scheme...
and create new scheme named after your flavor. Make sure that you have Runner target selected.
In the end you should have something like this:
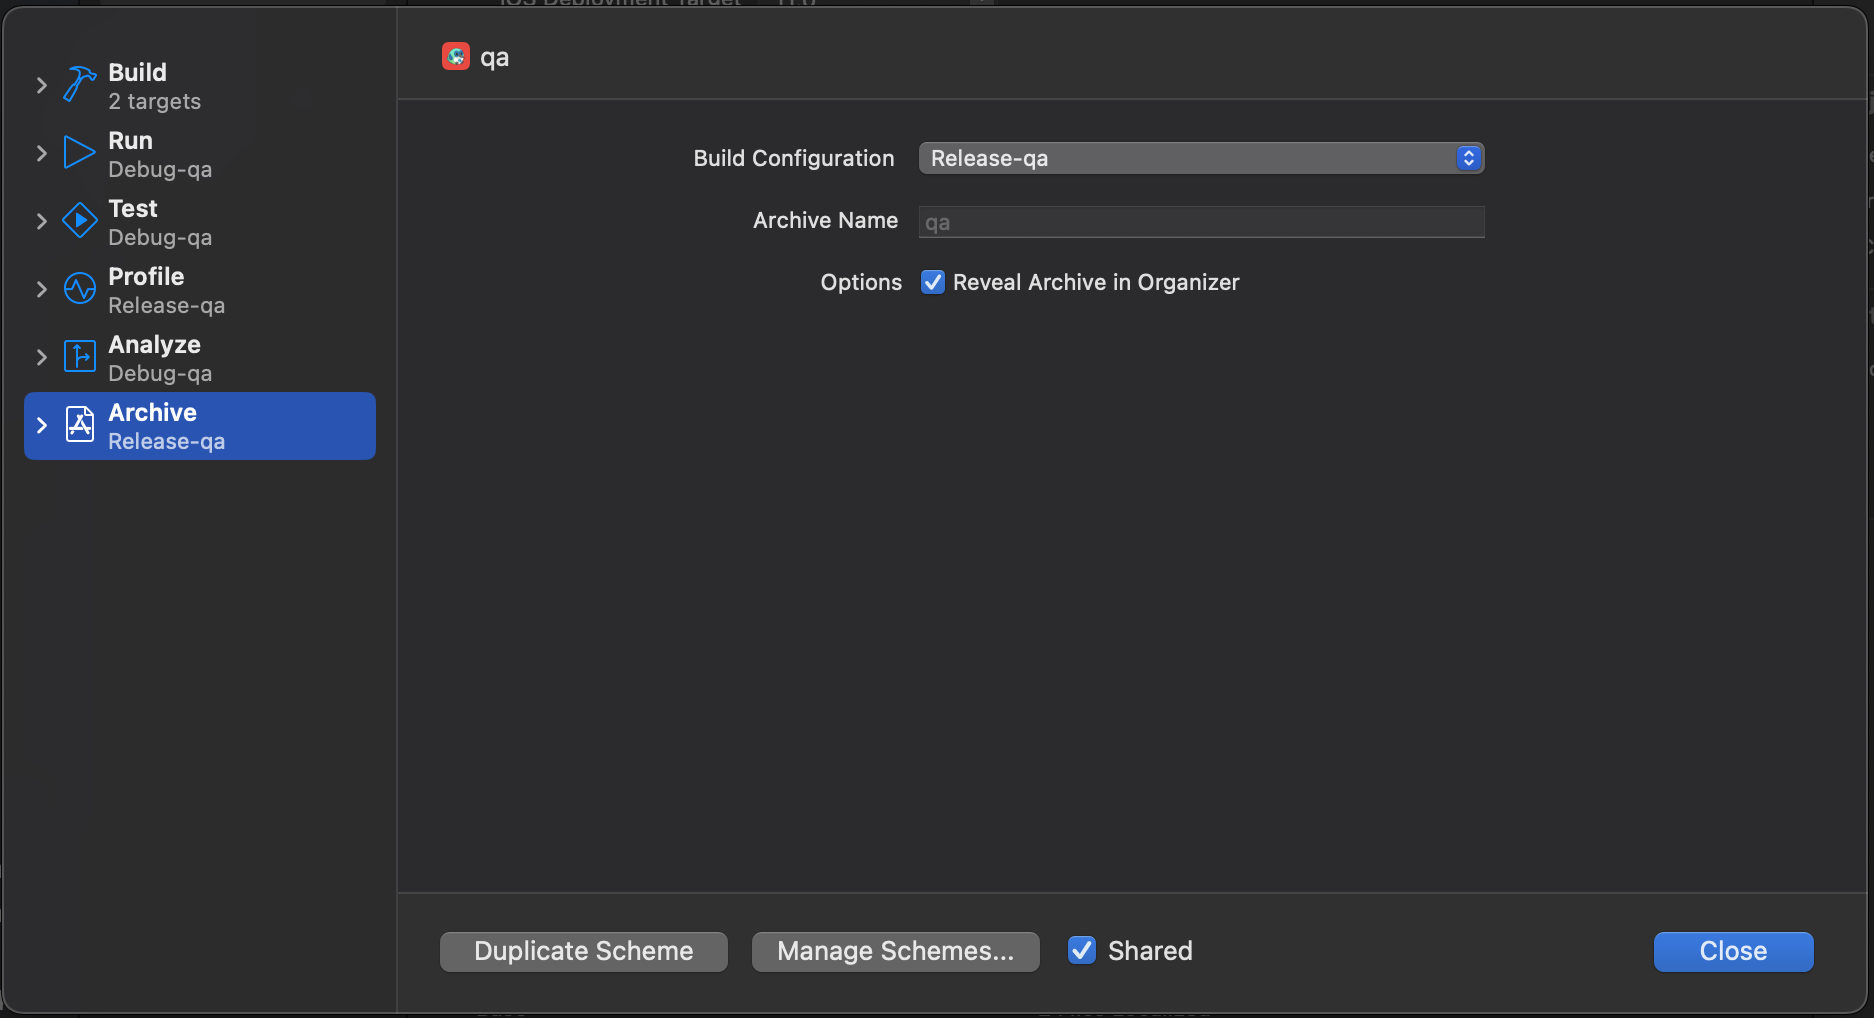
- Go to
Product -> Scheme -> Edit scheme...
and select correct Build Configuration for each of scheme:
Icons configuration
You also can specify different icons for each flavor. To do this, you need to create file flutter_launcher_icons-{your_flavor_name}.yaml. E.g. flutter_launcher_icons-qa.yaml. Then you can specify path to images, colors and other options for your flavor (read more about configuration).
Finally you need to run this command:
dart run flutter_launcher_iconsIDE Configuration
VSCode:
Open .vscode/launch.json and add following code:
 {
   "name": "Run qa",
   "request": "launch",
   "type": "dart",
   "args": [
      "--flavor",
       "qa"
    ]
  }
Now you can launch app with qa flavor by clicking on Run qa in debug tab:

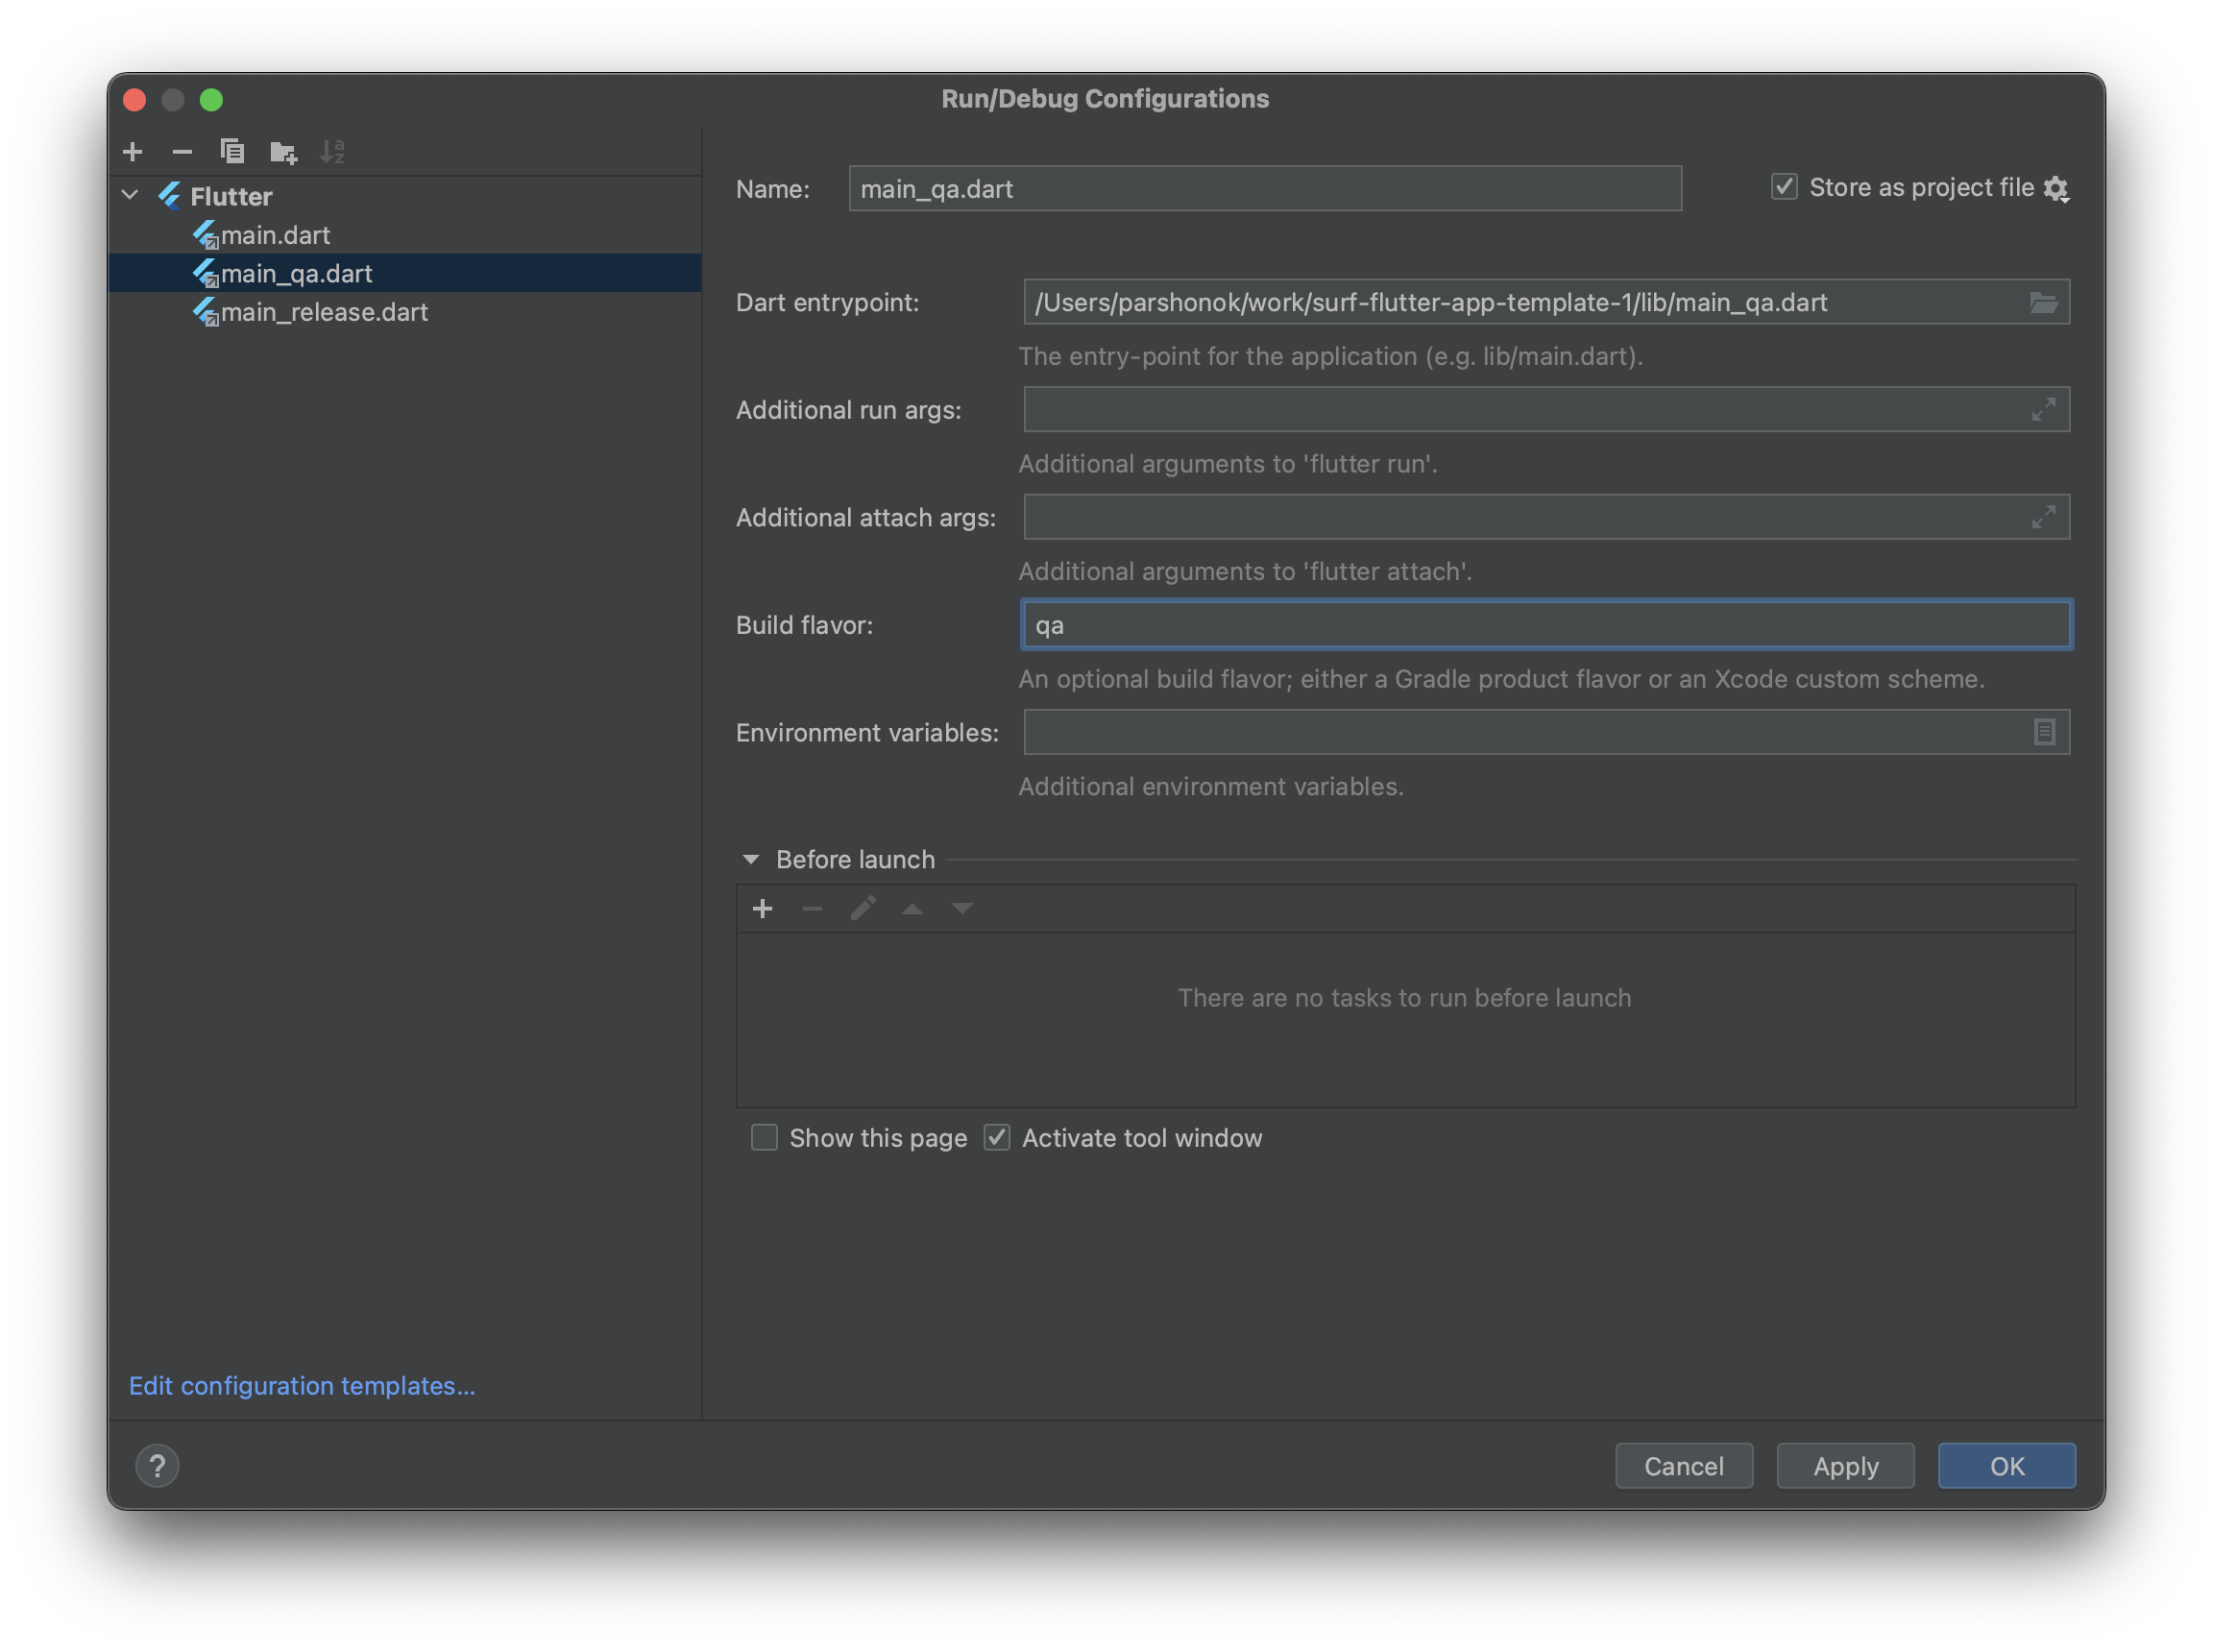
Android Studio:
Open Run/Debug Configurations and add new Flutter configuration. In Build flavor field add qa: