Setup the ApparenceKit dashboard template
What is the dashboard ?
The dashboard is a web app that allows you to manage your app content. Note: It is only for people having access to the ApparenceKit dashboard.It is not available on all plans.
🔥 ApparenceCli v5 will setup your dashboard entirely without any manual operation from you. So you can now skip this
The dashboard is only for Supabase projects.
Dashboard Setup
⚠️ Before starting the dashboard setup, you need to have setup your Supabase project with the kickstarter template. Check the Supabase setup documentation
1 - Deploy the dashboard sql file
Open the ApparenceKit-Supabase repository
(https://github.com/Apparence-io/ApparenceKit-supabase)
Open the file in supabase > dashboard-setup.sql
- Copy the content and paste it in the SQL editor of your Supabase dashboard.
- Run the script
This script will create the tables and add user management permissions to secure the access to the dashboard, and allow admin to read data.
2 - Deploy the custom_access_token_hook function
For those who want to use the dashboard, you need to deploy the previous steps. But also you need to create a webhook on the authentication.
- In the dashboard, navigate to Authentication > Hooks (Beta)
- Select the "custom_access_token_hook" postgres function
- Enable "Customize Access Token claims hook
Like this
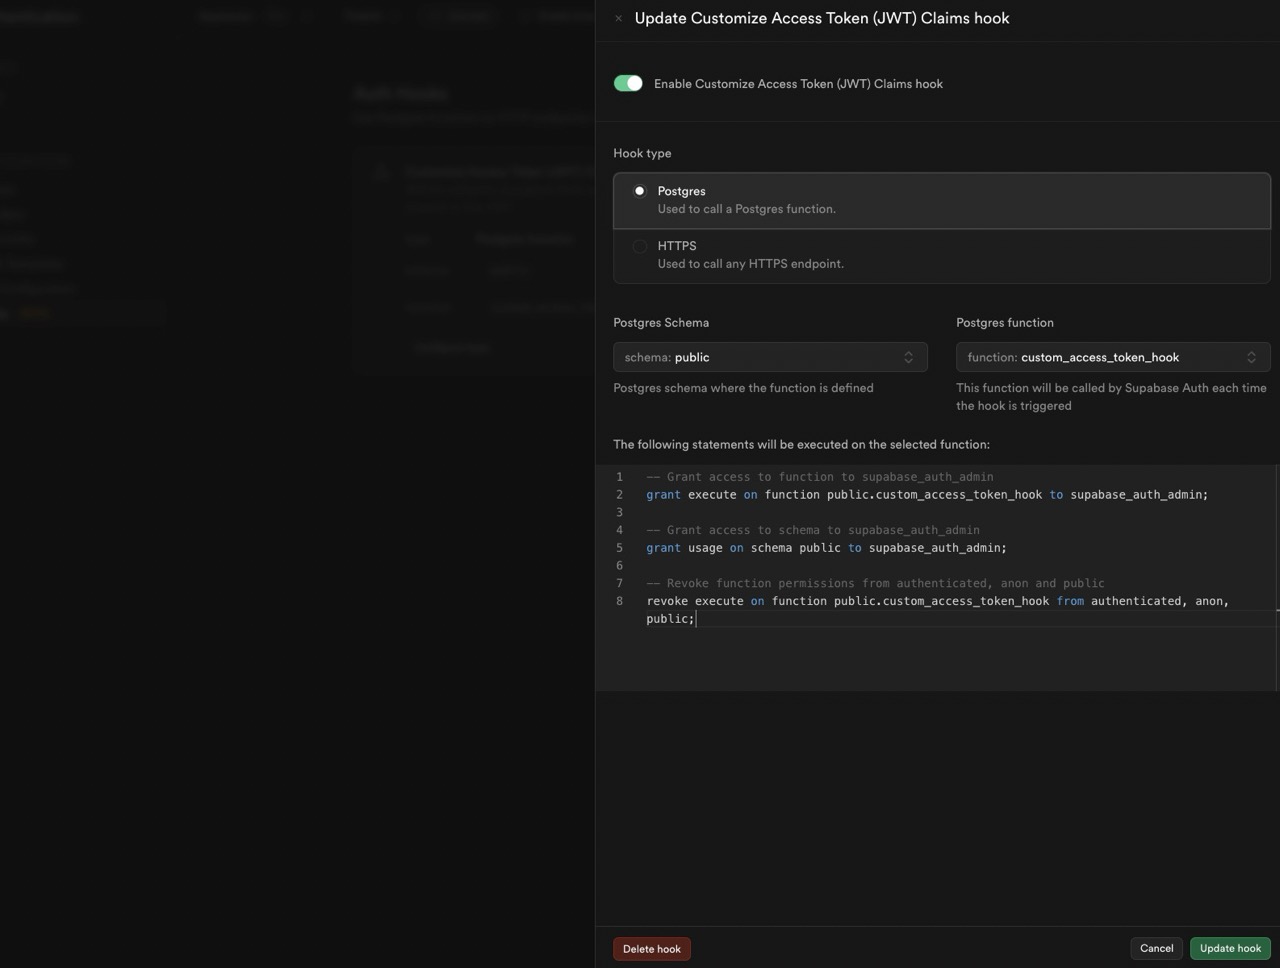
don't forget to enable "Customize Access Token claims hook"
Create your admin user
Once the dashboard is setup, you need to create an admin user.
Only admin user will be able to read data properly in the dashboard.
- Open the Supabase dashboard and navigate to the authentication tab.
- Create a new user with an email and password.
- open the table editor and navigate to the "user_roles" table
- Add a new row with the user id and the role "admin"
Now you can login to the dashboard with this user.
Setup notifications campaigns
Our dashboard allows you to schedule notifications campaigns. To do so, you need to create a new row in the notifications_campaigns table.
But before that you need to deploy the function "campaign".
1 - Deploy campaign function
supabase functions deploy campaign2 - enable cron extension
In order to send the notifications campaigns, you need to setup a CRON job that will call the function every minute to check if there is a new campaign to send.
Go to your Supabase dashboard > then Integrations > and enable the CRON extension.
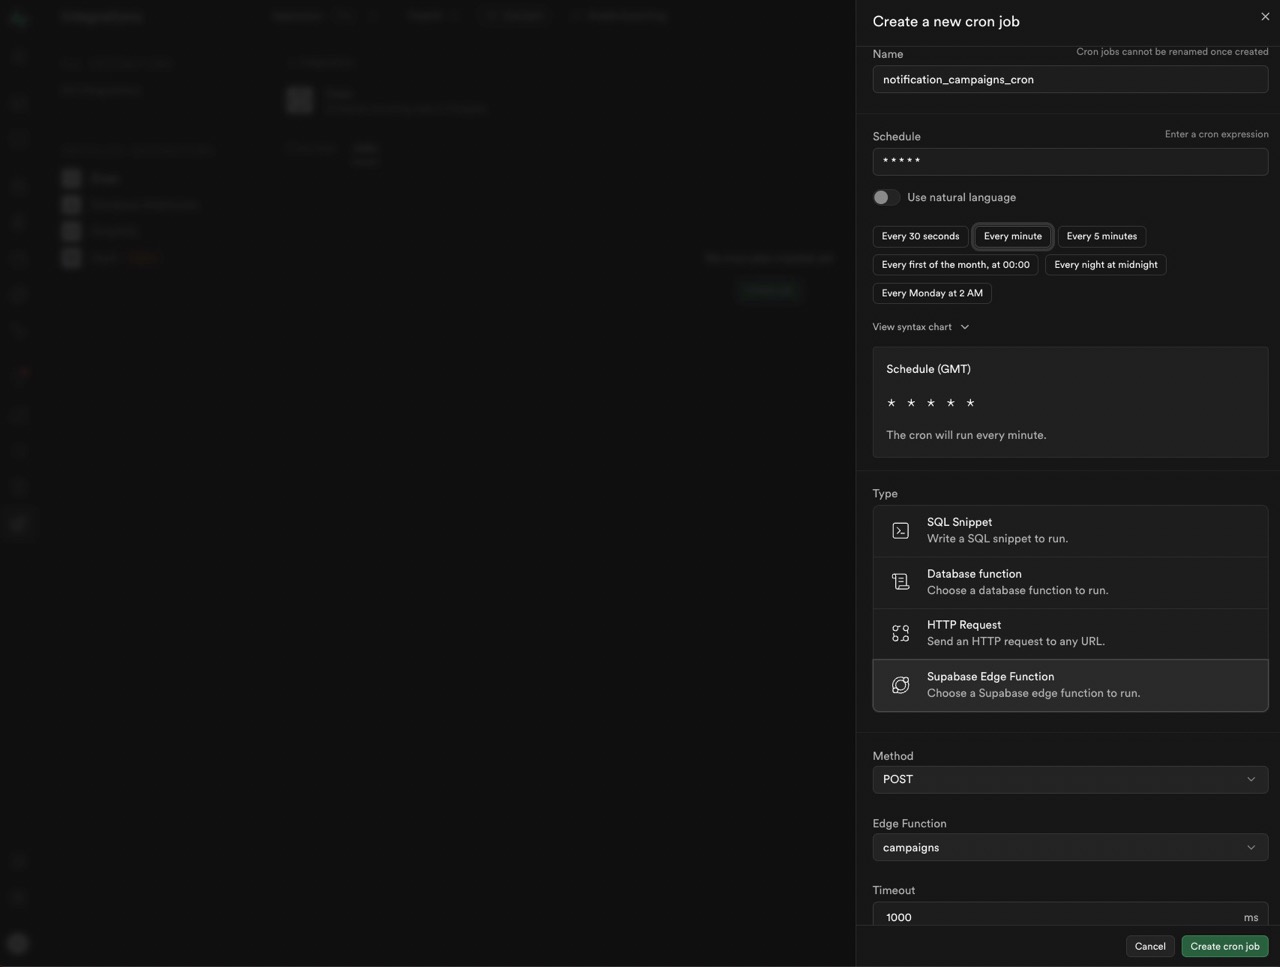
3 - setup the CRON job
On the installed CRON extension, click on the "Add job" button. Create a new job with the following parameters
- Name: send_notifications_campaigns (or whatever you want)
- Schedule: * * * * * (every minute)
- Type: Supabase edge function
- Function: campaign
- On Http header tap on "Add a new header" and then select "Add auth header with service key"
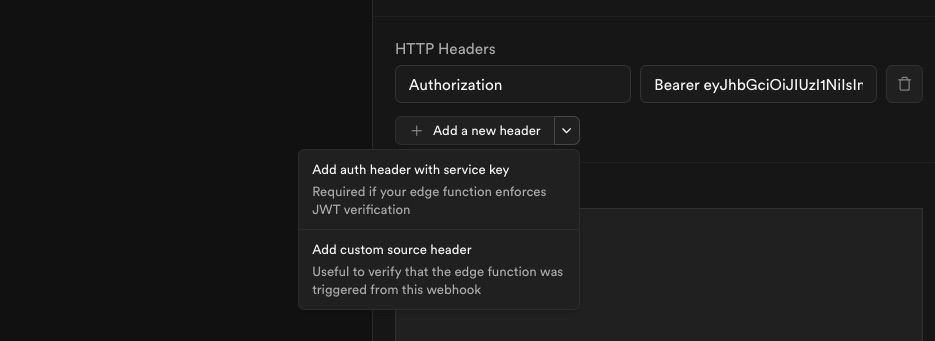
Now type "Create cron job" and you're done.
Run the dashboard
1 - Clone the dashboard repository
You can clone the dashboard repository from the following link https://github.com/Apparence-io/apparencekit-dashboard
2 - Run with the environment variables
Like the app, the dashboard is a flutter web app. To run the dashboard, you need to launch the app with the following command
flutter run --dart-define=ENV=dev \
    --dart-define=BACKEND_URL=YOUR_SUPABASE_PROJECT_URL \
    --dart-define=SUPABASE_TOKEN=YOUR_SUPABASE_PROJECT_TOKEN
You can get YOUR_SUPABASE_PROJECT_URL and YOUR_SUPABASE_PROJECT_TOKEN from the Supabase dashboard
- navigate to the settings tab and then API
- Take the URL and the anon key
or Usin VSCode, you can create a launch configuration.
Open the '.VSCode/launch.json' file and add your Supabase project url and token in the 'args' section.
...
    {
        "name": "Supabase - Development",
        "request": "launch",
        "type": "dart",
        "program": "lib/main.dart",
        "args": [
            "--dart-define=ENV=dev",
            "--dart-define=BACKEND_URL=", // 1 - Your Supabase project url
            "--dart-define=SUPABASE_TOKEN=", // 2 - Your Supabase project token
        ]
    },
3 - build the dashboard
To build the dashboard, you can run the following command
flutter build web --dart-define=ENV=dev \
    --dart-define=BACKEND_URL=YOUR_SUPABASE_PROJECT_URL \
    --dart-define=SUPABASE_TOKEN=YOUR_SUPABASE_PROJECT_TOKEN