Create a table view in the ApparenceKit dashboard
Our dashboard allows you to easily view any data table in minutes.
1 - Update your table policy
First you need to update your table policy to let user with admin role add, read and update on this table. (You can also just let admin read if there is nothing to update)
// Example of read policy
CREATE POLICY "Users can select" ON public.[YOUR TABLE]
  FOR SELECT TO public USING (auth.uid() = user_id OR (SELECT authorize('admin_all')));

// Example of insert policy where only admin can insert
CREATE POLICY "Enable insert for admin" ON public.[YOUR TABLE]
  FOR INSERT with check ((SELECT authorize('admin_all')));
Replace [YOUR TABLE] with the name of your table.
2 - Add the table view in the dashboard
Create a new page in the dashboard.
- Create a new page in the
lib/modules/[your module]/uifolder - Create a new widget in this file
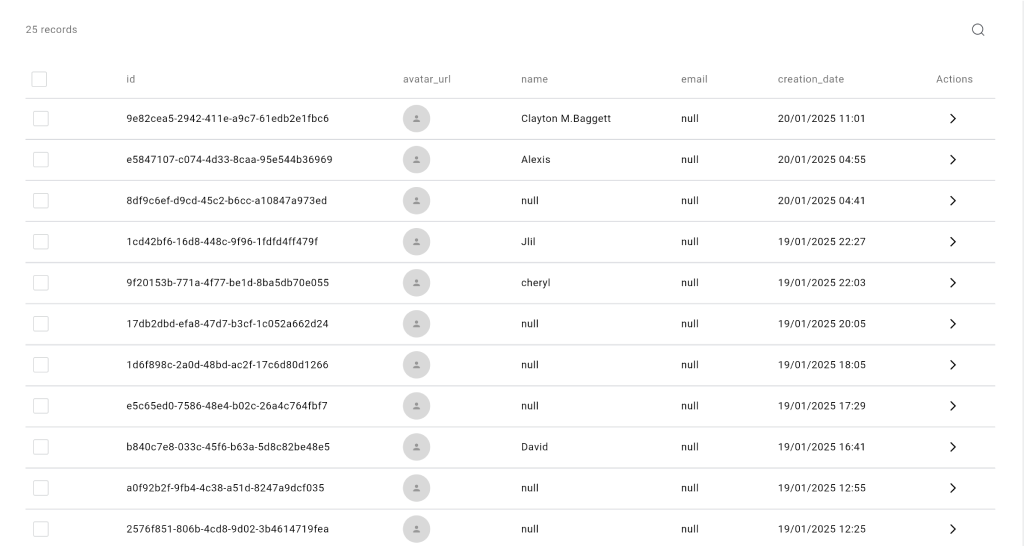
- Add this code to show raw data in a table view
Example :
RawDataTableComponent(
    tableName: 'subscriptions', // change this to [YOUR TABLE] name
    orderBy: 'creation_date',
    orderAscending: false,
    showPagination: true, // show pagination (default is true)
    showCheckbox: true, // Add a checkbox to select rows (default is true)
    showSearchBar: true, // Add a search bar to filter data (default is true)
    fields: [
        Field.fromString(name: 'user_id'), // Add your fields here (name is the column name)
        Field.fromDateTime(name: 'creation_date'),
        Field.fromDateTime(name: 'period_end_date'),
        Field.fromString(name: 'sku_id'),
        Field.fromString(name: 'store'),
        Field.fromString(name: 'status'),
    ],
    actionsBuilder: (row) { // Add actions to each row
        return [
            IconButton(
                onPressed: () => ..., // Add your action here or remove this line
                icon: Icon(Icons.arrow_forward_ios, size: 14, color: context.colors.onSurface),
            ),
        ];
    },
)
3 - Add the page to the dashboard menu
Add the page to the dashboard menu
- open the
lib/core/menu/widgets/sidebar_tabs.dartfile - Add a new item in the
tabslist
Example :
SideBarCategoryItem.fromPath(
    context: context,
    icon: HugeIcons.strokeRoundedInboxDownload, // Change this to your icon
    title: 'User requests', // Change this to your page title
    path: '/user-requests', // Change this to your page path
    routerState: state,
),
4 - Add the page to the dashboard router
- open the
lib/router.dartfile - Add a new route in the
routeslist
Example :
StatefulShellBranch(
    routes: [
        GoRoute(
            name: 'notifications', // Change this to your route name
            path: '/notifications', // Change this to your page path
            builder: (context, state) => YourNewPage(),
        ),
    ],
),
And you're done! You can now view your table in the dashboard. Also you have seen how to add a new page to the dashboard menu and router.